Soil Block Makers
Cheap, efficient seed starting
I’ve been using these for a dozen years to start seeds for annual flowers and a vegetable garden. They are superior to most methods when it comes to reducing transplant shock and simply make transplanting easier. Additionally, they allow me to save money on supplies at the expense of a little extra labor.
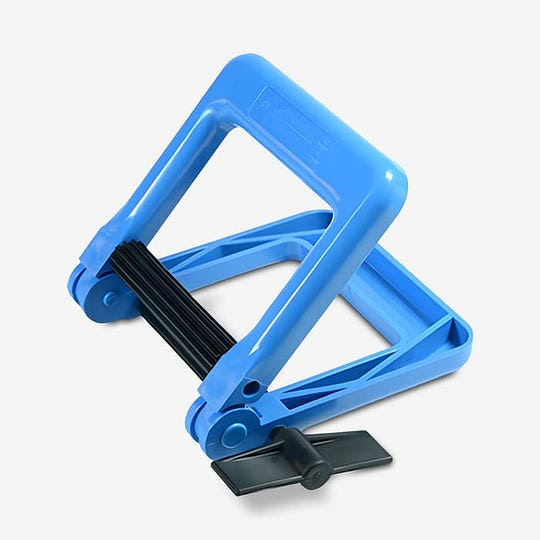
Soil block makers are hand-operated presses that make a compacted soil cube. You start seeds directly in the cube of compressed soil; no container is necessary. Since the cubes’ sides are in contact with air, roots will stop growing when they reach the side of the block. Contrast that with seedlings grown in the typical retail greenhouse’s flimsy plastic tray, in which the roots wrap around the space between the soil and plastic, becoming pot-bound.
When it comes time to transplant the cubes formed with soil block makers into the garden, just drop the block into the prepared hole. There’s no prying a pot-bound seedling from a container; no accidentally damaging the root system. I’ve tried various biodegradable containers designed to go right into the garden soil, including peat pots, peat and coconut blocks, even small paper bags designed to hold potting soil and seedlings. None of them decompose as quickly as advertised; this results in slower root growth after transplanting. Plus, buying new containers each year is an added expense. I also tried a tray system that’s sturdy, designed to be easy to water, has a better shape than greenhouse trays, and an integrated greenhouse cover. While it’s the best tray system I’ve ever used, buying enough of these trays to start all my seeds would be several hundred dollars in up-front expenses, and they’re a pain to store when not in use. My block maker is less expensive and only takes up about the space of a hardback novel.
Block makers come in several sizes, designed to handle different sized seedlings, or to allow potting-on from one size to the next. I’ve found the two-inch size covers most of my home-gardener needs.
The only downside I’ve found is you must water the blocks frequently or they dry out. I put my blocks on disposable foil cookie baking sheets, placed on shelves. Some people put the blocks on capillary mats, which stay wet and wick water into the block bottoms, so you don’t need to water as often. I’ve found that you still need to mist the blocks, and worse, plant roots can grow into the mat, causing the very root trauma you are trying to avoid. When it’s time to transplant, I slide the foil sheet onto a piece of plywood and carry it out to the garden.
The block maker I have is the Mini 4, by Ladbrooke. You can also purchase them, as well as soil block mix, or find more soil recipes and instructions for making your own soil blockers at Pottingblocks.com. Great advice and instructions for homemade blockers are here.
12/18/09Soil Block Makers $30 (2" blocker, 4 blocks)