Build It Solar

DIY Solar
I think it’s best to leave household solar electricity up to the pros right now. The panels are still expensive, improving every month, and the layout and installation, hookup, etc. are very tricky. (Check out Solar City or SunRun for your home.) But this is also a fine time for DIY-ers to leap ahead. A lot is happening among the maker crowd and the place to keep up with it all is Build It Solar, a free site with a sprawling collection of tutorials, recent projects, experimental results and handy resources. Not just solar, they cover alternative energy sources and conservation was well. The site is pretty well managed, and will follow up with updates on earlier experiments as much as possible.
07/4/13Excerpt
$2K Solar Space + Water Heating -- One Simple DIY System
These pages describe a very simple solar system that provides both solar space heating and solar water heating in one simple design that you can build.
Using all new, high quality materials, this system can be built for as little as $2000 -- about one 1/8th the price of an equivalent commercial system. Nearly all of the materials will be available at your local hardware or lumber yard. The system can be built with simple tools, and with ordinary DIY skills....
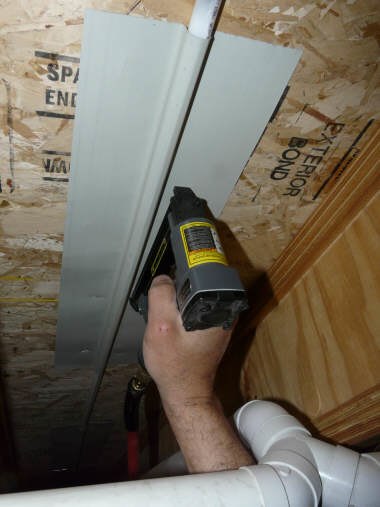
The PEX tubes efficiency of the heat transfer from the PEX to the floor is greatly improved by using these heat spreader plates. This means that lower temperature water can be used to transfer the same amount of heat to the floor, and this will make the whole solar system more efficient. The heat spreader plates are homemade and are exactly the same ones I have used in some of my solar collectors...
...So, for the conditions and energy prices assumed the payback period ranges from 2.5 years for propane up to up to 3.4 years for NG. Also bear in mind that you may qualify for some rebates or tax credits, and that as the price of fuel goes up the payback period, return on your investment, and peace of mind all improve.
*
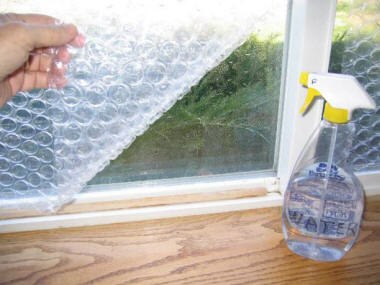
Bubble Wrap Window Insulation
I've used bubble wrap on windows for two three+ years now, and I'm amazed how quick and easy it is. This year, we are even covering the windows in the guest room -- we just take the bubble wrap down when guests come, and put it back up when they leave -- 15 seconds a window.
This is a simple technique for insulating windows with bubble wrap packing material. Bubble wrap is often used to insulate greenhouse windows in the winter, but it also seems to work fine for windows in the house. You can use it with or without regular or insulating window shades. It also works for windows of irregular shape, which can be difficult to find insulating shades for.
Its been five years since I put this page up, and I've heard from MANY people who are quite happy with using bubble wrap for window insulation.
The view through the bubble wrapped window is fuzzy, so don't use it on windows where you need a clear view. But, it does let plenty of light through.
Installation:
Cut the bubble wrap to the size of the window pane with scissors.
Spray a film of water on the window using a spray bottle.
Apply the bubble wrap while the window is still wet and press it into place.
The bubble side goes toward the glass.
To remove the bubble wrap, just pull it off starting from a corner. You can save it and use it for several years. It does not leave a mess or stains on the window glass. A few small pieces of double back tape can be helpful on really stubborn windows.
The bubblewrap can be installed in the fall, and removed in the spring. Judging by how mine looks after a year, it may last quite a while.
When you take the bubble wrap down, put a small number in on the upper right corner of each piece of bubble wrap, and write down which window that number goes with on a piece of paper. Save the paper for the installation next fall. This tells you instantly where each sheet goes, and which way its oriented.