I want your input on this newsletter. How am I doing? What do you like? Don’t like? What would you like to see? Help me create a publication that best serves the needs of its readers.
Gareth’s Tips, Tools, and Shop Tales is published by Cool Tools Lab. To receive the newsletter a week early, sign up here.
Comparing Circular Saw Blades
In this Project Farm video, Todd tests 15 different circular saw blades to find out which ones are the best. He tested blades for performance in ripping 2×4 lumber (before and after striking nails) and compared for performance while cutting through oak and ripping an 8’ pressure-treated 4×4. Bottom line? The Makita blade ($10) was best overall. The Spyder also performed surprisingly well for its $5 price tag (at time of testing), although that price is currently over $12 each, so look for it on sale. Doing a web search, I see it’s available at some e-tailers for under $7.
Cutlist Optimizer
Speaking of cutting things. If you have a woodworking project that involves a fairly complicated cut list, there is a free app called Cutlist Optimizer. It allows you to both organize your cut list to better keep track of all of your pieces and allows you to optimize the parts you can get from your sheet goods.
How to Calculate 555 Timer Frequency and Duration
Ah, the venerable 555 chip. One of the most useful and popular ICs in electronics history. Invented in 1971, released in 72, it remains a go-to solution for a myriad of timer, delay, pulse, and oscillation applications. In this Digi-Key video, they cover the steps for calculating the necessary resistor and capacitor values needed to achieve the frequency and signal duration that you’re after in your project.
The Power of Great Reference Books and Knowing the Names of Things
As both a maker and a word nerd (I edited Wired’s “Jargon Watch” column for 13 years), I’ve always tried to impress upon people the power in knowing what something is called. Knowing the proper name for something allows you to look it up, learn about it, track it down (if it’s a tangible object). In this Adam Savage video, he harps on the same thing. He does so while extolling the virtues of a book he recently discovered and loves, the Backstage Handbook. This visual technical reference is for stagecraft, but most of its contents–divided into tools, hardware, materials, shop math, electrics, and architecture–can be applied to all manner of making. You you get to learn the proper names for all of the tools, hardware, and materials it covers. Magic!
TOYS! StylusReach Flexible Flashlight
Cool Tools has launched a new newsletter called Tools for Possibilities. Every week, subscribers get sent a page from the CT book: Cool Tools: A Catalog of Possibilities. I was tickled to see that the first page I was sent had a review that I wrote on the StylusReach flashlight. The Cool Tools catalog was released in 2013. Nine years later and I still have, use, and love this flashlight. Good tools do that.
Newsletter reader Paco Hidalgo sent this in response to the piece in the last issue on water and baking soda as a CA glue accelerator.
“I first tried the Zip Kicker CA accelerator and found its smell very disagreeable, nauseating, and the spray bottle made it very difficult to apply just a small drop. I later leaned that cyanoacrylate glues “set” (polymerize) by the mere presence of trace amounts of water vapor in the atmosphere. This infographic explains.
“So, I concluded that if that is the case, then liquid water would certainly accelerate the polymerization. I found that just a drop of water from a toothpick or needle onto a blob of the glue does indeed accelerate the setting process. I never heard of using baking soda but that would add a foreign material to the bond. Why do that? [See comment below] There would be no reason to mix baking soda with water since water alone does a good job.
“BTW: A ‘secret’ that I learned from the guy at the counter of a mall hobby shop, is that CA glues will keep indefinitely in the freezer. I think the dry environment prevents the glue from polymerizing. The manufacturers don’t want you to know that so they tell you not to freeze their glues. I keep partial bottles of different types of CA glue, including LOCTITE, sealed inside a ziploc bag in the freezer that are at least 10 years old. I can take a bottle and use it immediately without waiting for it to come to room temp. It is liquid and works just as fast. I wipe the tip with acetone after each use and keep a common pin in the narrow opening so it doesn’t clog.
“I keep all my solvent glues, including Lexel, E6000, and Goop in the freezer too, with the same result. I think the cold environment keeps the solvent from evaporating and escaping from the imperfect seal that normally shortens the shelf life. I keep epoxy glues in the refrigerator. This is enough to prevent them from self-polymerizing.”
[Just to clarify: Baking soda is commonly used by itself as an accelerator, especially in the hobby/modeling communities. Besides being an accelerator, it adds more structure to the join. Large amounts of baking soda can be added to CA glue to create a very hard material. This soda and CA combo as a structural material is common among luthiers repairing bridges and fret boards. It can be sanded, drilled, etc.]
Become a Patron!Support our reviews, videos, and podcasts on Patreon!
Cool tools really work.
A cool tool can be any book, gadget, software, video, map, hardware, material, or website that is tried and true. All reviews on this site are written by readers who have actually used the tool and others like it. Items can be either old or new as long as they are wonderful. We post things we like and ignore the rest. Suggestions for tools much better than what is recommended here are always wanted.
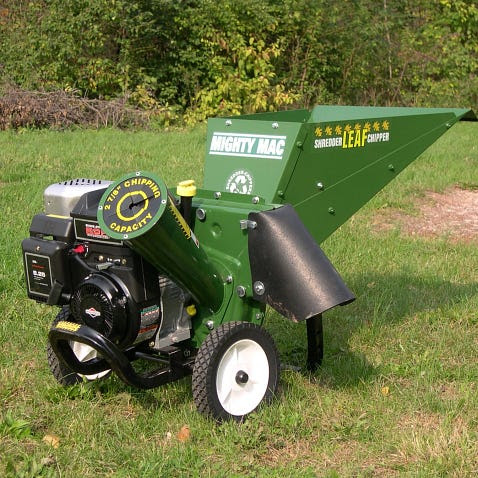
I bought a Mighty Mac shredder/chipper about 25 years ago, have used it — heavily at times — all these years and, with a few engine repairs and turning the shredder blades around once (they are 2-sided), it’s worked flawlessly on our 1/2-acre homestead. This is a “hammermill” chipper with free-swinging hammer blades for the top-feed hopper, as well as a chipper, a side feed where you put in larger branches (it will grind up a 2×4) at a 90-degree angle to the balanced flywheel blade that runs on the same axle as the shredder blades. If you get one of the bigger professional type units you don’t need a separate grinder, but for home-style operation, I wouldn’t fool with any of the lower-cost feed-it-in-the-top units. You don’t really need to shred stuff like oak leaves (they compost nicely as is), and the smaller shredders tend to choke on stuff such as 1-incg diameter branches. This unit has changeable screens so you can adjust from fine to coarse output.
Be aware: these are dangerous tools. If you get careless and push down on brush in the hopper and get a sleeve caught in the blades, you’ll end up with a mangled (or no) hand. See the simple 2×4 pusher tool below for pushing stuck vegetation into the blades. I also use a Collins machete for chopping up branches for easy feeding and of course — Grandma speaking here — goggles (chips fly), earphones, and gloves.
Mine (depicted above) has a 7HP Briggs and Stratton motor. The current models have a 10 HP. I wouldn’t bother with the electric starter; the rope pull works fine. — Lloyd Kahn
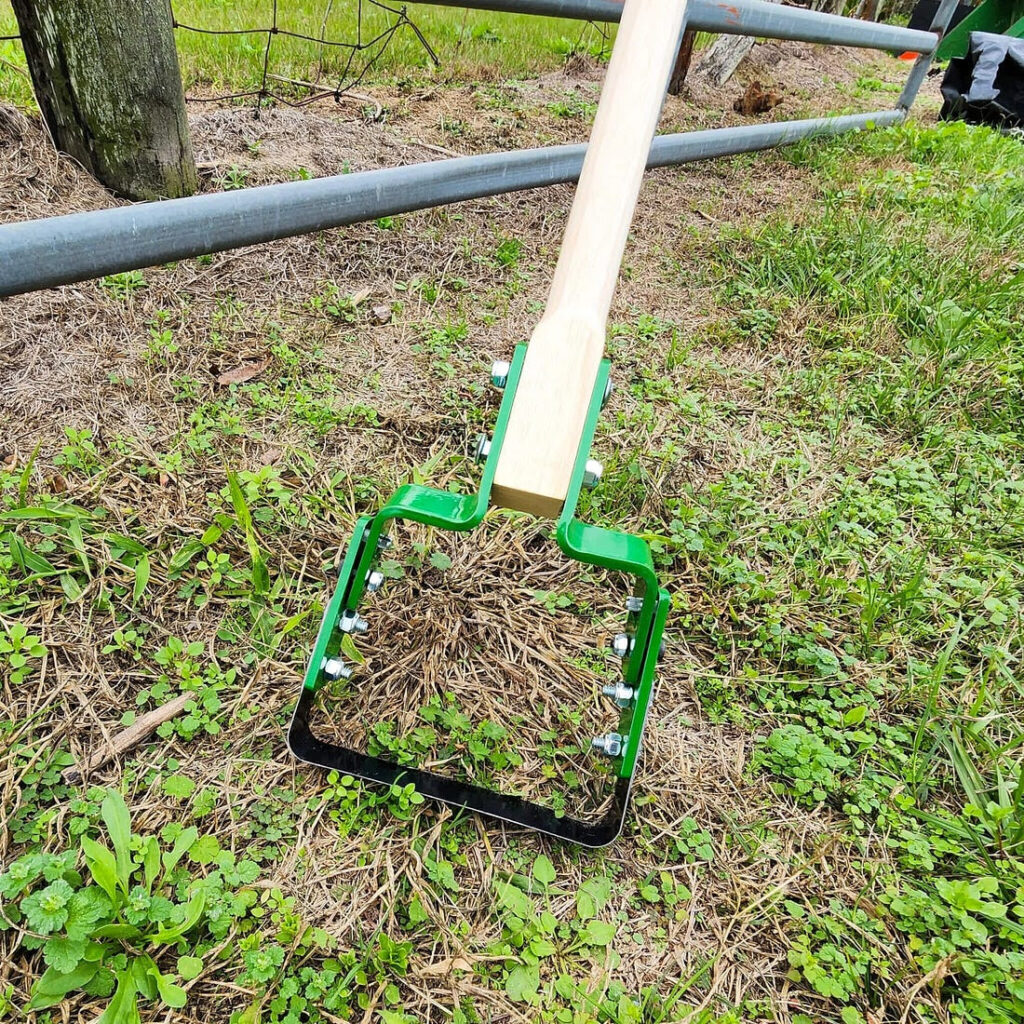
The most recent addition to my quiver of essential landscaping tools is the stirrup hoe. The stirrup hoe is a deceptively simple device which, as the name implies, is a stirrup-shaped blade attached to the end of a stout wooden handle.
The stirrup hoe has two primary functions: First, it is useful for loosening the top layer of soil in a garden or flowerbed. The horizontal blade tends to glide about an inch beneath the surface of the soil without noticeably disturbing the soil. Weeds can deposit seeds that remain dormant in the soil until exposed to sunlight. While turning the soil with a spade brings these unwanted seeds to light the stirrup hoe leaves them in the dark. I prefer using a long pulling motion with this hoe while others recommend working it back and forth.
The second use for this tool is weeding. As the stirrup hoe glides through the soil, it snags weeds at their roots. The entire plant usually comes out of the dirt with less mess than if you pulled it by hand. Using my stirrup hoe, I recently weeded 30 feet of an abandoned flowerbed in about 10 minutes. Normally, this job would have taken at least an hour.
Prices range from about $17 for the Sears Craftsman model (with lifetime warranty) I use to $33 for the high-end Swiss-made Glaser (handle sold separately). — Sherard Edington
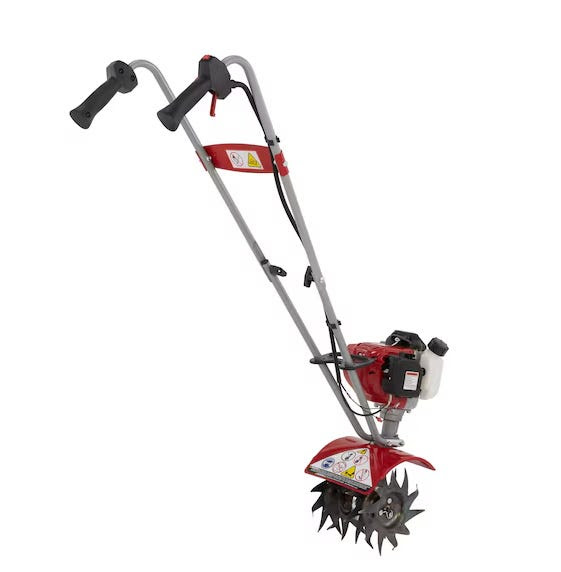
The Mantis tiller is a lightweight tiller (about 25 lbs), which allows for better portability than heavier tillers. It is easily moved from location to location (try that with a big Troy-bilt), and will handle a variety of jobs with various blades on the tiller shafts: tilling, digging shrub or tree holes, aerating lawns, de-thatching lawns, edging sidewalks or planting beds, making the vertical cuts in sod to be (re-)moved, mixing compost, or even a new steel spring wheel designed to clean cracks or debris and weeds in sidewalks or patios. I have three large bins (4x4x6-feet each) that I use for composting leaves and grass clippings. I simply take down the front boards and use the Mantis to mix the compost inside and in front of the bins. Then I put the boards back and reload the bins with the mixture. Short work with the Mantis. After viewing my Mantis in action, a landscape company supervisor in Peachtree City bought ten (10) of them for his company use, one for each of their work trucks.
A Mantis is better than competing small tillers like the Honda or Sears, because of the unique design of the tiller blades. They can be swapped side to side to till deeply or lightly, are very sharp and have a squiggly (my word) design that thoroughly mixes the soil. The tiller blades are warranted against breakage. The worm-gear design of the shaft that drives the tiller axles may be unique, as well, since it is very hard to stall this tiller, no matter how many vines you wrap around the axles. The variety of blades, plus the ability to use them for light or heavy penetration (e.g., tilling, aerating and edging) makes the Mantis somewhat unique.
It is not a “heavy-duty” tiller that you would usually use to till an acre of ground. If I needed that job done, I’d rent a Troy-bilt or other massive tiller for dedicated tilling of large areas, even though they are not very easy to transport or use. However my brother used his Mantis to till a large lawn (1/3 acre) which need to be re-sodded. — Jim Stagg
The Mantis is a little jewel. They are exceptionally easy to work with, being easy to start and incredibly lightweight. I have two caveats though: 1) To use it most effectively, you have to put it in front of you and then walk backwards, dragging the machine with you while simultaneously trying to keep on eye on the machine and where you’re about to step. 2) Tough plants have a tendency to get tangled up in the tines. Fortunately, the tines can be removed, cleaned of offending material, and replaced very quickly.
By the way, Mantis offers a lifetime guarantee on the tiller’s tines. If a tine ever breaks, they’ll replace it. Hmm.. I guess that would be a “lifetine” guarantee! Every home with a garden should have one of these. They’re that good. — John Bodoni
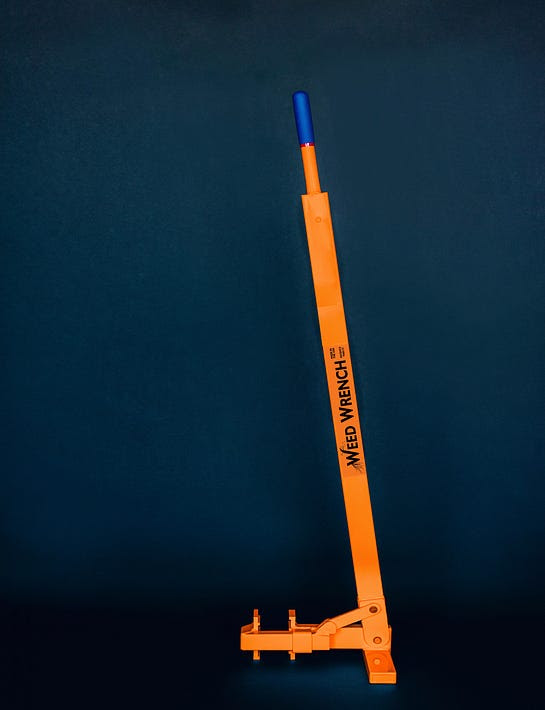
The tool for the job if you’re uprooting alien and invasive plants such as French broom and Scotch broom. Those plants, like other invasives, tend to form aggressive monoculture areas that drive out local biodiversity, and they often make dense undergrowth fire hazards. Ripping them out is a kind of joy — a fine workout, more productive in every way than a couple hours at the gym.
Built like a cast-iron frying pan, the Weed Wrench is a seriously macho tool. Its fierce jaws grip the miscreant plant or small tree by the throat (base of stem), and big leverage yanks it bodily out of the ground. If you get the smallest (mini) and the largest Weed Wrenches, you’ve got everything covered up to 2 inch diameter (beyond that, use a saw). — Stewart Brand
Many of us who own land in coastal northern California have a constant problem eradicating (or even keeping under control) Scotch broom, that ubiquitous plant with the yellow flowers that covers more of the hills every year. After a rain it isn’t too hard to pull out if you have a strong back and the right warrior spirit. But sometimes they are just too big or the ground is too dry. That’s when you need the Weed Wrench. It’s basically a big lever with a set of jaws at ground level to grip the trunk of the plant. You pull slowly until the jaws engage then yank it out of the ground, roots and all. If broom or other woody weeds are a problem for you, get one of these things. There’s nothing else that even comes close for effective broom removal. It amazes me that they aren’t in every hardware story in northern California, but so it is. Order it from the web site. They come in four sizes. The medium is probably best for most jobs. — John Coate
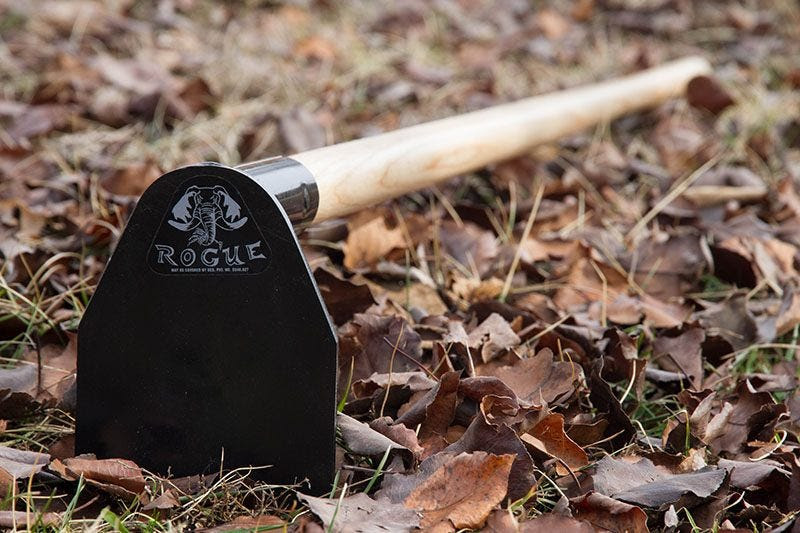
After trying several types of gardening on my homestead in the rainy Pacific Northwest (where my favored “no-till” sheetmulching seems to fail miserably), I’ve settled on the lightly-cultivated approach of Steve Solomon (soilandhealth.org). The old-fashioned and well-sharpened garden hoe is the workhorse of this technique.
After going to every garden center and hardware store around, and going through a few cheaper units with bad handles and unsharpenable blades, I decided to spend what it takes to get a good one. Imagine my pleasant surprise when the finest hoes I could find online were the same price OR CHEAPER than the flimsy, cheaply made Mexican and Chinese imported units.
Rogue Hoes are all about $30 and come in a myriad of sizes and blade shapes. I use the 65g for general soil-mixing-and-moving and weed slicing and the 60S “stealth bomber” to remove weeds from tight spots. The blade takes a very keen edge with a little filing and the handles should last a very long time with occasional oiling and the most basic of care: keep them out of the rain and hang them with the blade and handle off the ground. — Rob Campbell
Once a week we’ll send out a page from Cool Tools: A Catalog of Possibilities. The tools might be outdated or obsolete, and the links to them may or may not work. We present these vintage recommendations as is because the possibilities they inspire are new. Sign up here to get Tools for Possibilities a week early in your inbox.