Compression Pipe Repair Coupling

No-Solder Repair Coupling for Copper Pipes
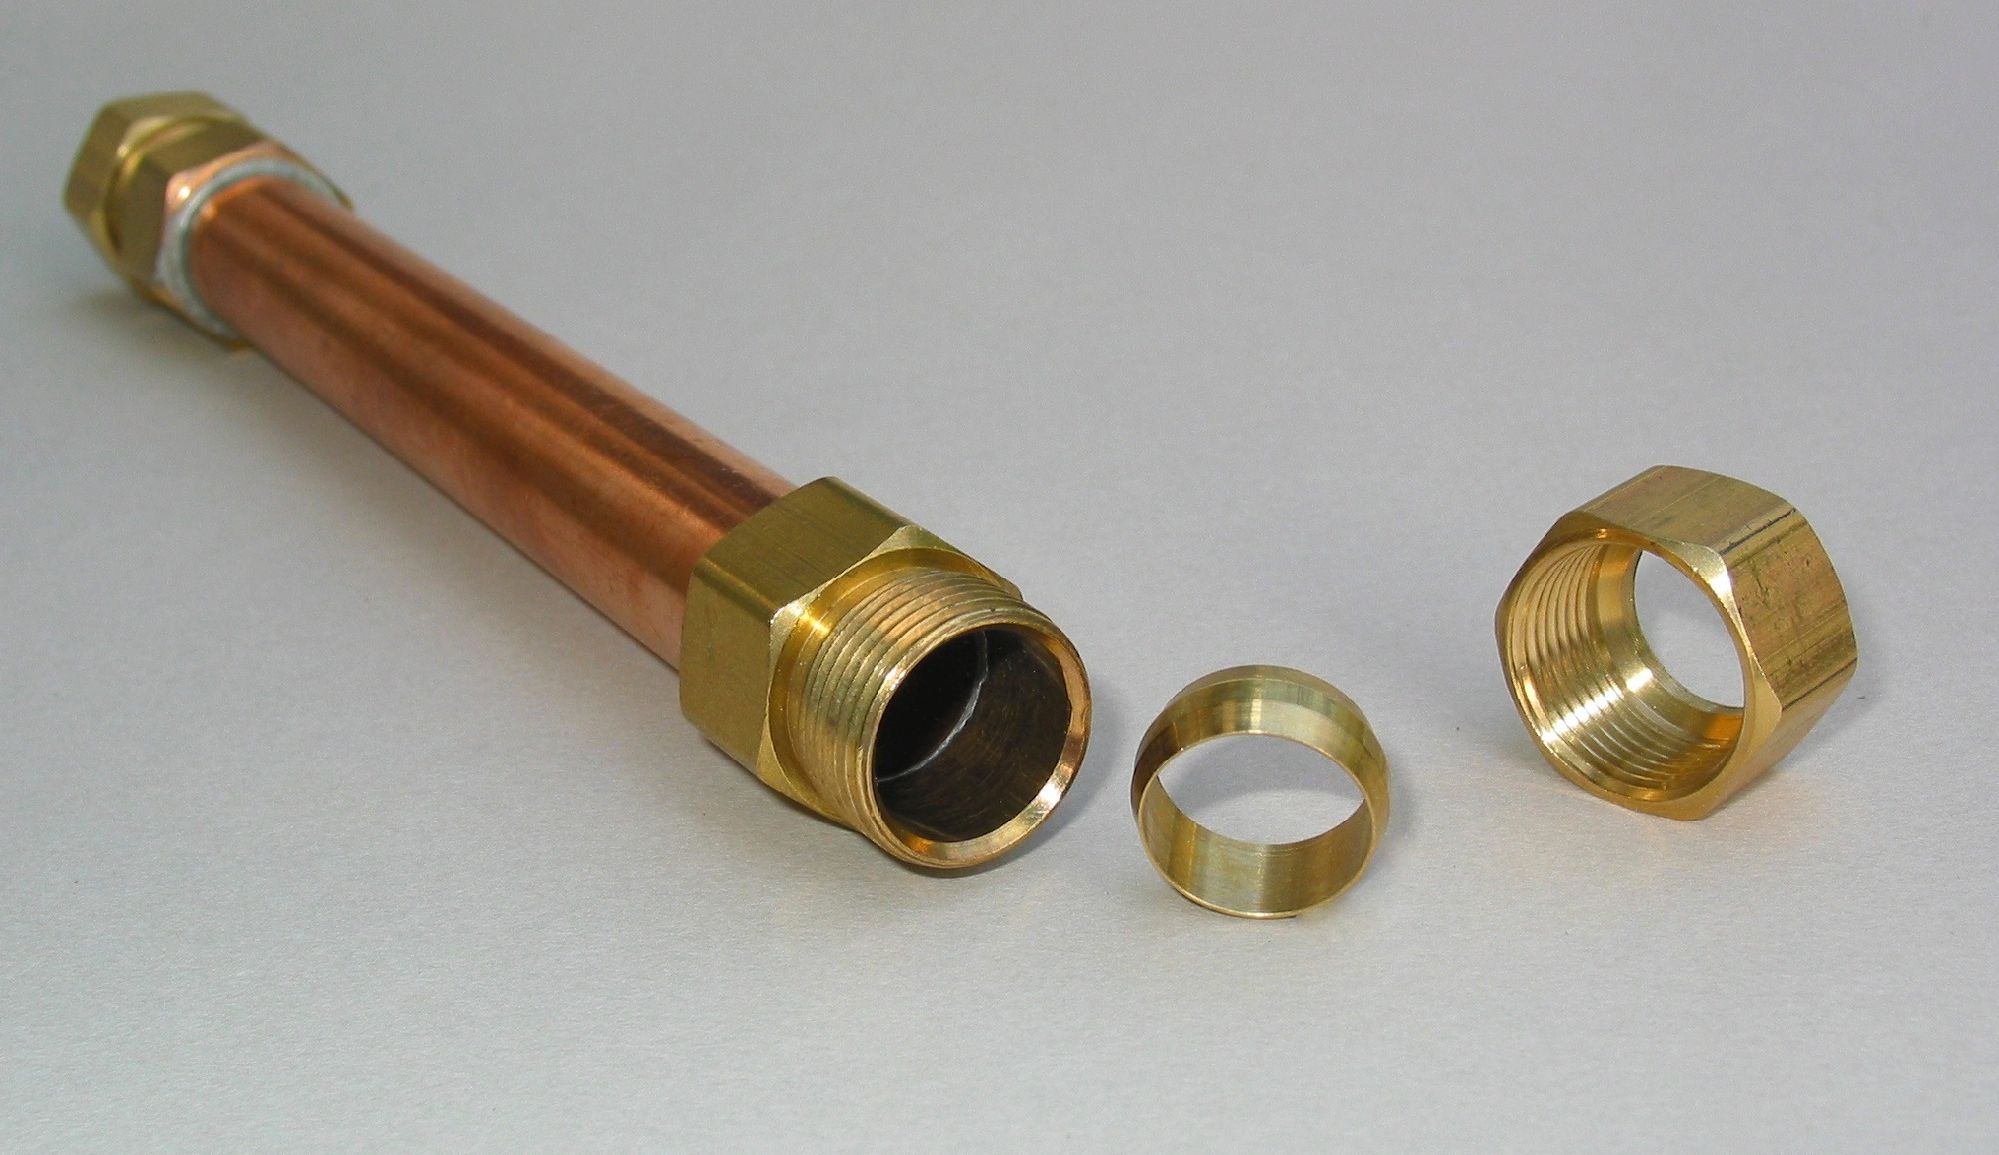
(Large photo) Rigid copper water pipe is generally sturdy stuff but it is not indestructible. Errant nails and screws will pierce it and deep freezes in uninsulated spaces can split it. Consequently, when copper pipes do fail, they tend to do so at the most inopportune times and in the most unforgiving places. (I once gutted an 1826 post-and-beam schoolhouse in the frozen depths of a Vermont winter, so I know whereof I speak.)
Rigid copper pipe is typically joined by soldering — using an open-flame torch in tight spaces next to wood framing — so replacing damaged pipe sections can be perilous. Unless, that is, you use a copper compression repair coupling, also called a copper slip-repair coupling.
A repair coupling is a straight length of pipe (typically 12″ long) with a compression fitting at each end. Each fitting contains a brass ferrule which, when compressed, creates a watertight seal. (Lavatory risers typically use compression fittings.)
Repair couplings are available for both ½″ and ¾″ copper pipe. For example, Home Depot sells a 7/8″ x 12″ copper compression repair coupling that fits over ¾″. pipe. In other words, the coupling’s inner diameter is essentially the same as the ¾″ pipe’s outer diameter. No-solder repair couplings cost roughly $25 at Sears or Home Depot; Amazon offers a ½″ repair coupling for about $15.
Replacing the damaged section of pipe with the repair coupling is straightforward. Turn off the water, open taps to drain the water pipes, and heed these four tips:
1. Note the length of the repair coupling — including the depth of its sockets — and remove exactly that length of the damaged pipe.
2. Use a wheeled pipe cutter to produce a clean cut that is square to the length of the pipe. If space is limited, use a close-quarters cutter. Ream inside the cut to remove barbs, and use emery cloth to lightly sand the outside of the pipe ends.
3. Use a pair of adjustable wrenches to tighten each end of the coupling.
4. Turn the water back on and test the repair coupling for leaks before you replace the section of drywall you removed to access the damaged pipe.
03/14/13Compression Coupling Price varies by size and source


