How to Cut EVA Foam on a CNC Router
Gareth's Tips, Tools, and Shop Tales - Issue #118
Have you entered a tip on this Maker Update video for a chance to win one of 5 copies of Tips and Tales from the Workshop, Vol 2 or a grand prize of Vol. 1, Vol. 2, and a Maker’s Notebook gift box? I’ll be announcing the winners in next week’s newsletter.
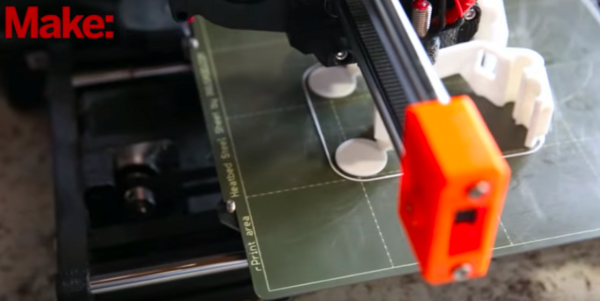
How to Cut EVA Foam on a CNC Router
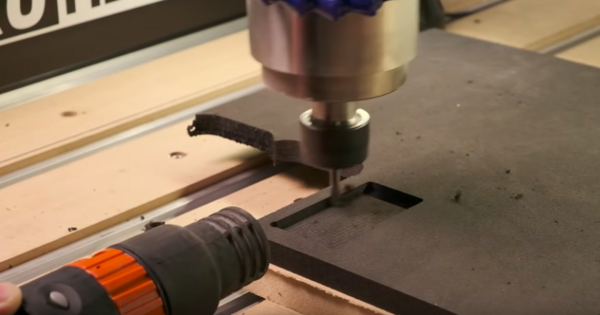
Can you successful cut EVA foam on a CNC machine? That’s the question they wanted to answer at Carbide 3D. The answer is, yes, yes you can. There are a few issues to consider, like how to clamp your workpiece to the table (use not-too-aggressive double-sided tape) and what end mill to use (you can get away with a standard mill, but one specialized for use on plastic and foam works best). It’s also recommended that you use a shop vac during cutting as strings of the foam tend to wrap around the mill. And, use conventional cutting, not climb cutting. With these few considerations, you can achieve a reasonable fit and finish to EVA foam cut on a router.
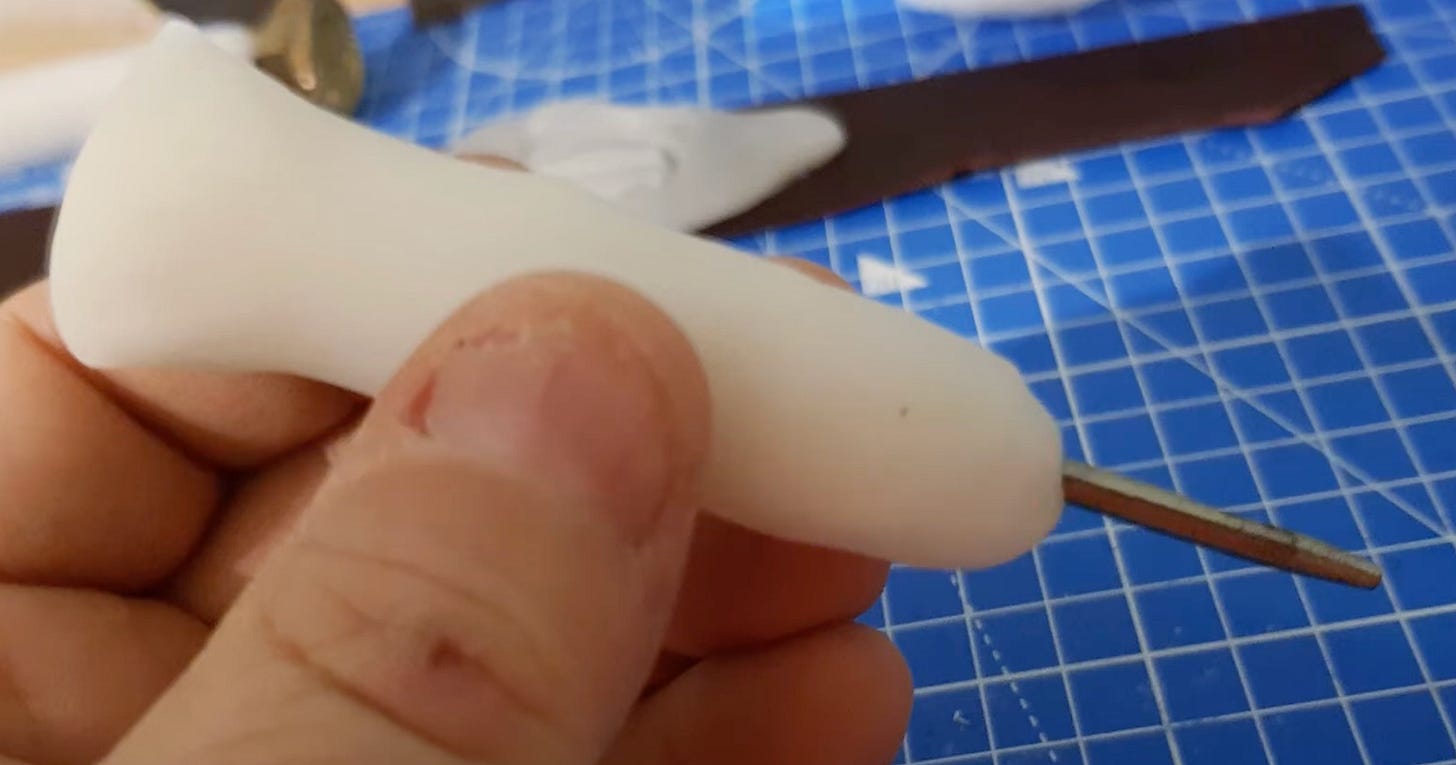
Add “Mouse Ears” to Your 3D Print to Avoid Warping and popping off the build plate
On Make:, Caleb Kraft shares a simple and fast trick for when you have adhesion problems with some areas of a 3D print. You can add little “mouse ears” to the print which increase the surface area for better bed adhesion. These thin little disks of plastic can then be snapped off when you’re done.
Testing Circular Saws

On the latest Project Farm video, Todd tests out battery-powered circular saws. The brands tested were FLEX, Milwaukee, Bosch, Makita, DeWalt, Kobalt, WORX, Ryobi One+ HP, Craftsman, and Ridgid. The saws were tested for cutting speed, max torque, blade speed, saw vibration, the responsiveness of the electronics, blade brake (blade stopping speed), RPM, weight, and more. So, which ones performed best? Well, maybe not surprising, the Flex ($300 at Lowe’s) and the Milwaukee (at $275). But, the Craftsman (at only $70) also performed surprisingly well.
Tuning Up a Cheap Lathe Chuck
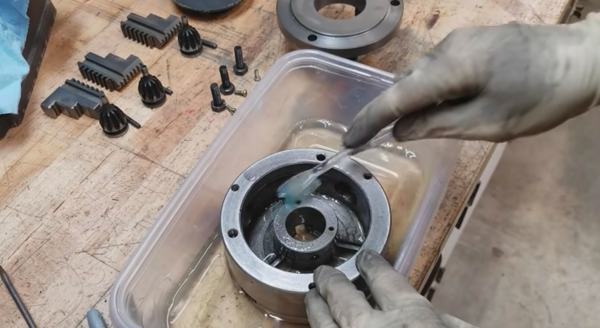
A good, precision-made lathe chuck can be very expensive. You can save some real money by buying an import chuck, but as with most things, you get what you pay for. In this BlondiHacks video, Quinn runs through what you can do to clean and optimize a new, cheap chuck (or an old used one that might need some loving care). This mainly involves taking the chuck apart, cleaning out the machining dust, de-burring it (something they skip in cheap chuck manufacture), and giving it a good oiling. Someone in the video comments had a great tip. After you reassemble a freshly-oiled chuck, it is going to spatter oil the first time you spin it up. This person recommends affixing a paper bag over the chuck and running it at high speed to catch the excess oil.
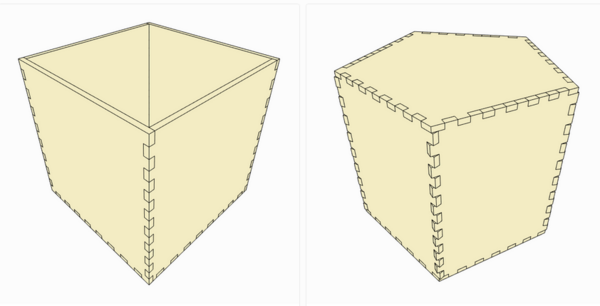
A Web App for Creating Project Boxes
Palate-Cleanser Projects

On a recent Black Magic Craft, game crafter Jeremy Pillipow shared an idea that’s worth repeating. Jeremy is in the middle of a huge effort to create his own roleplaying game. This project is consuming most of his time and energy. To help break some of the surface tension of that daunting task, he decided to take a break and create something whimsical and fun, just for the hell of it. Personally, I think of these as palate-cleanser projects. Something to remind yourself of the pure joy of making and to take your mind off of the more daunting task. I often use my hobby as a miniature painter as a palate cleanser. When I’m working on a really intense writing project (like trying to get a book to bed), I’ll periodically wheel my chair over to my painting desk and take 20-30 minutes to lose myself in a miniature. Works wonders.
Shop Talk

New subscriber Jim Ashley sent me this tip:
“My shop, like many others I’m sure, changes often, and I found it a bit tedious to remount power strips using the existing mounting holes. Having to remeasure, set screw depth, etc. What I’ve done for the last few years is to ziptie the power strip to a piece of plywood, with a couple of dados cut on the underneath sides to allow the plywood to be flush-mount somewhere in the shop, e.g. beam, paneled wall, etc. Then, I drill some countersink holes in the plywood and mount where desired. It allows for quick mounting and relocation of the power strip when reconfiguring a space.
***
Adam Farrow-Palmer wrote me to share this:
“Here’s a simple one I learned when I was laboring…when your carpenter’s pencil gets too short to hold comfortably, slip a bit of hose/tubing over the end. I love your newsletter!”
04/28/22(Gareth’s Tips, Tools, and Shop Tales is published by Cool Tools Lab. To receive the newsletter a week early, sign up here. — editors)