Once a week we’ll send out a page from Cool Tools: A Catalog of Possibilities. The tools might be outdated or obsolete, but the possibilities they inspire are new. Sign up here to get Tools for Possibilities a week early in your inbox.
Best knot teacher
Animated Knots, animatedknots.com All knots are knotty and hard to visualize the first time. This free website is the best knot teacher yet. It beats any of the beginner books I’ve seen, as well as all the other knot websites. The key here is the stepped animations synchronized with instructions, which you can run at any speed. Replay them till you get them right. Animated Knots is the next best thing to having old Pete next to ya. Once you get the basic ones down, try some of the harder ones. There are 75 cool knots animated in total. – KK
Next step beyond the basic knots
Morrow Guide to Knots, $18 Knots are such fundamental tools, and matching the right job with the right knot is so often essential, the important next step from the Klutz Book is the equally lucid and fairly comprehensive Morrow Guide to Knots. Last week my wife Ryan gave a glad cry at the clarity in the book when she wanted to see a couple ways to tie a clove hitch, and learned that it’s easy to put a slip in a clove hitch for quick release. – Stewart Brand
Knot substitute
Nite Ize Figure 9 Carabiner, $7 The Figure 9 carabiner lets you quickly fasten – and quickly loosen or adjust – a small-diameter rope to a fixed point without a knot deploying a clever combination of friction and angles. To those of us with knot-dyslexia, this is a real boon. The only requirement: your fixed attachment point must feature either a place to clip the carabiner (i.e. a metal loop in a pick-up truck bed or a thin, sturdy tree branch), or something around which your line can be looped. That could mean securing a Tarp tent to a tree, improvising a handle around a bundle of cables, or securing a travel clothesline between window-grate and curtain-rod.
All you need to do is pull the rope through in the right sequence and finish with the rope’s loose end tugged into the notched “V” section to keep the rope attached and taut. There are actually multiple sequences and ways to work the geometry. Three methods are diagrammed in the instructions that come with the carabiner.
Thus far, I have used the devices only with standard-issue parachute cord, but they’re sized to work with a range of small-diameter ropes. Though the tying system looks suspiciously wimpy, I’ve found it is as robust as promised. I ordered the Figure 9s to replace the mesh netting that came with the roof-rack basket on my car. Not only do these make a decent replacement (i.e. riding around with a kayak strapped to my car this summer), but tying one more knot under the car is something I’m glad to skip. Note: the device is anodized aluminum and weighs a bit more than I expected (slight downside to ultra-light hikers); still, “Not for climbing” is printed on the packaging, repeated in the instructions, and emblazoned on each carabiner. I think they mean it. – Timothy Lord
Quick, easy tie-down
Rope Ratchet, $20 (¼-inch, w/rope) roperatchet.com I wanted to rig a single line of rope across the ceiling of my garage for a storage solution, but was concerned about getting the line tight enough to keep from sagging. Rather than tie up a come-along winch – which requires a lot more hook up room and has a tendency to release quite hard – I saw the Rope Ratchet and decided to give it a try; I’m glad I did. The contraption is basically a rope that’s fed into and around a ratcheting wheel and bracket that holds the line and prevents backspin; you can release the line with a lever. It’s quite simple, but I haven’t seen anything quite like it. I’m using one to hold up a 70-lbs. tackle bag 6 feet off the floor of my garage and another holding about 80 lbs. of plastic lures on a rope stretched across hooks against the ceiling of my garage. I’m using the ¼-inch Rope Ratchet that’s rated for a working load of 150 lbs., but there are different sizes for different needs: the 1/8-inch will hold 75 lbs. up, while the ½-inch will hold 500 lbs. After a number of months, mine are holding strong with no sign of failure. – Doug Mainor
Become a Patron!Support our reviews, videos, and podcasts on Patreon!
Cool tools really work.
A cool tool can be any book, gadget, software, video, map, hardware, material, or website that is tried and true. All reviews on this site are written by readers who have actually used the tool and others like it. Items can be either old or new as long as they are wonderful. We post things we like and ignore the rest. Suggestions for tools much better than what is recommended here are always wanted.
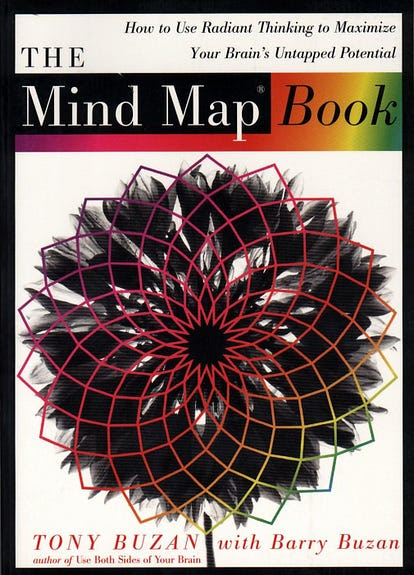
Mind maps are a tool for thinking. Instead of arranging your ideas in a sequence — as a list of words — you draw them in an arboreal fashion, radiating out from one starting notion. Mind maps use pictures instead of words, radial branches instead of linear lists, starfish instead of ladders, and associations instead of priorities — and as a result you think different. The visual trees you generate as you mindmap mirror the dendritic nature of our brain, and seem to flow more organically and (after practice) with less effort than the rigid discipline of making 1,2,3 textual notes.
They are easy to doodle. Anyone can make them. Kids and CEOs as well as creative types. I’ve come to employ this style of radial association in my own note taking and personal brainstorming. You don’t need this book to do it, but the book will help you refine your style, and it will help you expend its use. The authors, who’ve been perfecting and evangelizing this technique for decades, offer advice on how to use mindmaps to teach, as a form of diary, and most importantly, as a group exercise, say in corporate brainstorming sessions.
There are software programs for mindmapping (which I have not tried), but for me the intensely kinetic mode of drawing ideas (if even on tiny scratch paper) is a great part of the technique’s ability to produce new and different perspectives.
-- KK
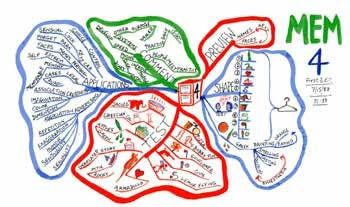
Always use a central image An image automatically focuses the eye and the brain. It triggers numerous associations and is astoundingly effective as a memory aid. In addition an image is attractive - on many levels. It attracts you, it pleases you and it draws your attention to itself. If a particular word (rather than an image) is absolutely central to your Mind Map, the word can be made into an image by using dimension, multiple colours, and attractive form. Use images throughout your mind map Using images wherever possible gives all the benefits described above, as well as creating a stimulating balance between your visual and linguistic cortical skills, and improving your visual perception.
Variation in size is the best way of indicating the relative importance of items in a hierarchy. Expanded size adds emphasis, thereby increasing the probability of recall.
In order to develop a truly personal Mind Mapping style, you should follow the '1+' rule. This means that every Mind Map you do should be slightly more colourful, slightly more three dimensional, slightly more imaginative, slightly more associatively logical, and/or slightly more beautiful than the last.
Progression of noting a 'very unhappy afternoon' in which application of the Mind Map laws brings the noter much closer to the truth.
The Mind Map is an expression of Radiant Thinking and is therefore a natural function of the human mind. It is a powerful graphic technique which provides a universal key to unlocking the potential of the brain. The Mind Map can be applied to every aspect of life where improved learning and clearer thinking will enhance human performance. The Mind map has four essential characteristics:a) The subject of attention is crystallised in a central image.b) The main themes of the subject radiate from the central image as branches.c) Branches comprise a key image or key word printed on an associated line. Topics of lesser importance are also represented as branches attached to higher level branches.d) The branches form a connected nodal structure. Mind Maps are particularly useful for chairing meetings. The chairperson has the agenda on a basic Mind Map and can use this fundamental frame to add thoughts, guide discussions, and record the basic outline of the what will eventually be the minutes of the meeting. Colour coding can be used to indicate action, ideas, question marks, and important areas. Chairing a meeting this way allows the person in the chair to be much like a captain of a starship guiding it safely through the clusters and galaxies of ideas.
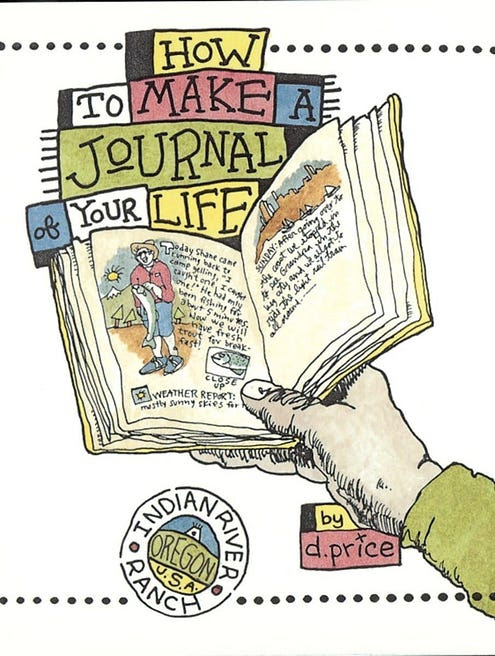
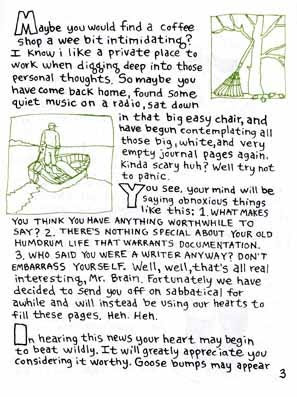
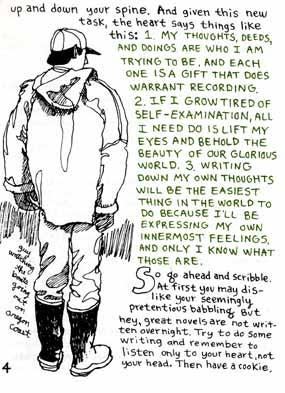
Most people take journaling either way too serious, or not serious enough. For such a key life-skill it should be more like you — expressive, idiosyncratic, unique. This tiny chapbook is the best guide I know of to get you started in journaling, and keep you going. Hand drawn with inspiration, it properly emphasizes the value of graphic thinking in the examined life. It is wise, brief, and fun. I’ve given one copy to each of my kids. Although it does not mention blogging, and assumes you’ll use a notebook, I think every blogger and blogger-hopeful should read it. — KK
Once a week we’ll send out a page from Cool Tools: A Catalog of Possibilities. The tools might be outdated or obsolete, and the links to them may or may not work. We present these vintage recommendations as is because the possibilities they inspire are new. Sign up here to get Tools for Possibilities a week early in your inbox.