Beginning Sous Vide
Low temperature cooking
There’s a new way of cooking. When food is simmered in a sealed pouch at low temperatures for long periods of time the food flavors are surprisingly enhanced. Meats in particular benefit from this type of preparation, called sous vide in French. I found fish and veggies made by this method to be amazingly tasty, with a unique texture and bursting with savories. Meats are stunningly moist without being overdone or underdone. This method is neither roasting, stewing, or searing. It’s a whole new method of cooking that brings a new set of flavors, textures, and treats.
But lower cooking temperatures require more exactitude, and the food pouches need to have their air removed to ensure even cooking, so the equipment to cook this way has been expensive and confined to fancy restaurants. Naturally, amateurs quickly figured out home versions, while appliance makers started selling cheaper residential gadgets.
But know-how was still in short supply. I found this cookbook the best one to start out with. Low temperature or sous vide cooking requires a whole new set of recipes. Cooking times are so different you need charts to determine duration and temperature, which this book provides. This guide explains the principles extremely well and they assume you’ll be using homemade or home grade equipment. Basically what you need is a water bath that can maintain its temperature to within a few degrees over several hours or more. Dedicated units have bubblers and thermostats to keep very even water temperatures. And an ordinary FoodSaver freezer vacuum unit will produce airless watertight pouches of food.
However there is an extremely easy and cheap way to try out sous vide cooking for the first time without buying any equipment at all. You are limited in what you can do, but you’ll get an idea of what the process can do. All you need is a cooler, a kitchen thermometer, and a vacuum packed hunk of food from the grocery store.
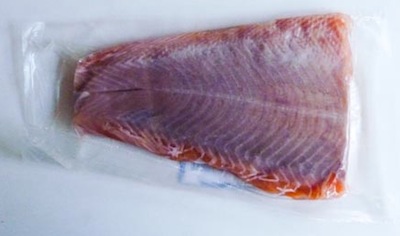
As as example, we took some frozen vacuum packed fish from Trader Joes. First you defrost it.
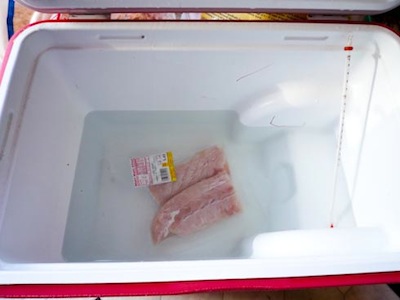
Then you fill up the cooler halfway or so with water heated on the stove to the appropriate low temperature (found in the book or online). In the case of fish it’s probably not much above the maximum temperature coming out of your water heater. Let the food steep in the water for the required time. (It can be up to hours for meat.) You may need to add some hot water if your thermometer shows the water cooling. Unwrap the finished fish and add sauce.
If you like the results you can build your own bath, or purchase a home unit, and use this book to guide your exploration.
08/16/11Excerpt
Sample excerpts:
The basic concept of sous vide cooking is that food should be cooked at the temperature it will be served at. For instance, if you are cooking a steak to medium rare, you want to serve it at 131°F.
With traditional cooking methods you would normally cook it on a hot grill or oven at around 400°F-500°F and pull it off at the right moment when the middle has reached 131°F. This results in a bulls eye effect of burnt meat on the outside turning to medium rare in the middle. This steak cooked sous vide would be cooked at 131°F for several hours. This will result in the entire piece of meat being a perfectly cooked medium rare. The steak would then usually be quickly seared at a high heat to add the flavorful, browned crust to it.
*
A great low-cost method of sealing your food is food-grade ziploc bags. They have a few drawbacks but work great for short cooked foods, especially if you are just getting started with sous vide cooking and do not want to spend any up-front money. In most cases sealing your foods with ziploc bags is also a lot easier than using a vacuum sealer.
*
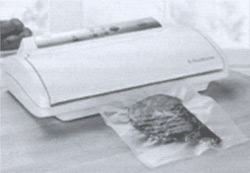
Many home cooks prefer a standard home vacuum sealer like a FoodSaver. These vacuum sealers work by inserting the opening of the sous vide food pouch into a small depression in the machine. The sealer then sucks the air out of the pouch and seals it using a heating element. They are the most cost effective method of vacuum sealing your food.
*
The main advantage is price. If you already have a cooler and ziploc bags then it is basically free to try.
Another advantage is that the water coming out of many home faucets is around 131°F-139°F, meaning it is the perfect temperature to cook steak in. If your faucet is in that range it just means you rink up the tap water, fill the cooler, and throw int he steak. It can be very simple.
*
Some of the most impressive results of sous vide are created with tough cuts of beef. Sous vide allows you to do things that traditional methods are unable to accomplish, such as cooking short ribs medium-rare but still tenderizing them, or creating fall-apart medium-rare roasts.
This is accomplished because cooking tough cuts of beef with sous vide allows you to break down and tenderize the meat without cooking it above medium-rare and drying it out. Once temperatures in beef go above 140°F the meat begins to dry out and become more bland. However, they also start to tenderize more quickly above this temperature which is why tough roasts and braises are done for hour at high temperatures. Using sous vide, you can hold the meat below 140°F for a long enough time for the tenderizing process to run its course.
*
Most tough cuts of beef are cooked sous vide for between 1 and 2 days. However, for some more tender beef roasts shorter cooking times of 4 to 8 hours will be enough time to tenderize the meat fully.
*
If adding a sauce or marinade make sure your vacuum sealer does not suck it out, you can normally seal it before all the air is out to prevent this just fine. Also, we do not recommend using fresh garlic, onions, or ginnier, as they can begin to take on a bad flavor over the long cooking times.
Beginning Sous Vide Jason Logsdon 2010, 201 pages $23


