Finding the High Point of a Horizontal Pipe
Gareth's Tips, Tools, and Shop Tales - Issue #36
Finding the High Point of a Horizontal Pipe, Dowel, or Other Round Object
Find the high point of a round workpiece.
Another great tip from the brilliant Emory Kimbrough:
Here’s a fast and easy way of finding the high point of a horizontal pipe, dowel, or other round object, using common tools.
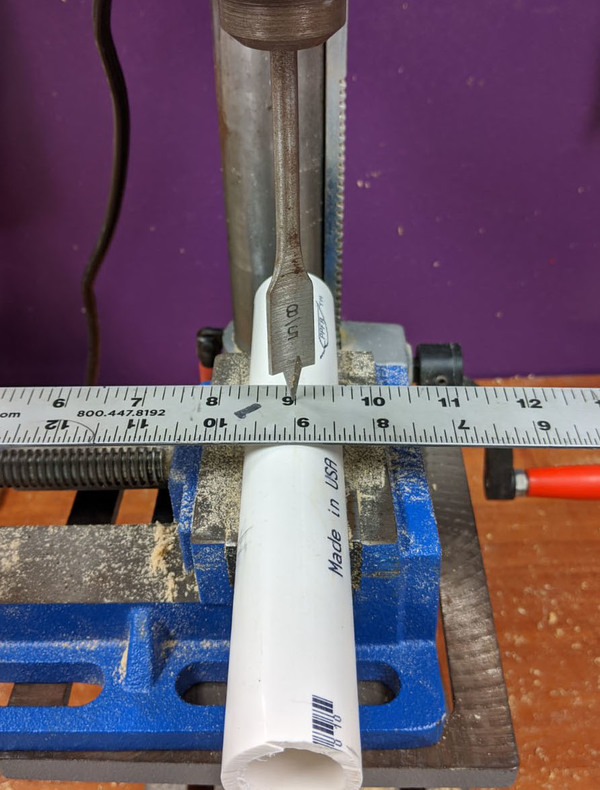
First, clamp the cylinder horizontally into a drill press vise (or any other secure holder, such as a V-block, that you can slide around on your drill press table). Slide the clamped cylinder directly under the press’s chuck, using your best eyeball guess.
Next, place something sharp and pointy into the drill press chuck – the point in the center of a Forstner bit is ideal, but other bits will work, as will a sharp nail with the head cut off.
Now, place a metal ruler crossways on top of the cylinder, roughly balanced (see photo). Lower the drill press handle until your pointy object lightly presses the ruler against the top of the cylinder. Most likely, your eyeball guess was slightly off of perfect alignment, so the trapped ruler will lean left or right, since it’s being pressed into the cylinder slightly off of the peak. Just slide the clamped cylinder as needed to make the ruler level.
When the pointy thing holds the ruler level, the drill press chuck is now straight above the highest point on the cylinder. Clamp the vise to the table without moving it, and everything is now aligned to drill right through the center.
This method also works with spheres. Just check that the ruler doesn’t tilt right-or-left or front-or-back. You can also use a metal sheet to better see the tilt on both axes.
You can even do this by hand, without a drill press. Press the ruler gently against the cylinder or sphere with the tip of a pen or pencil, moving the point until the ruler levels. Now, carefully slide the ruler out of the way without moving the hand that’s holding the pencil or pen, and make a mark. No, it’s not as accurate as using the drill press, but it’s still better than guessing by eye.
If you need to draw a line along the crest of a cylinder instead of a single mark, just make two marks, as widely separated as possible, using this method, and draw a line connecting the two marks.
Comparing Li-ion Power Tool Battery Packs, Cheap vs. DeWalt
Are DeWalts worth double the price?
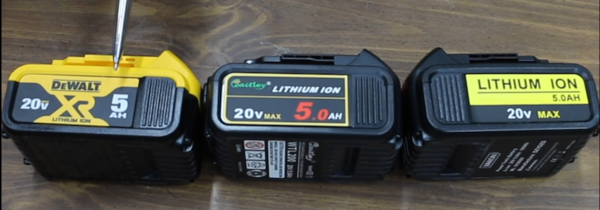
In this Project Farm video, Todd compares the performance of three Li-ion battery packs, the US$66 DCB-205 DeWalt, a $26 Vanon battery, and a $28 Waitley pack. Spoiler: The Vanon performed about as poorly as expected. The DeWalt was the best in the bunch, but was it more than twice-the-price good? No. The Waitley did surprisingly well, and at less than half the price of a DeWalt, it’s definitely worth the money.
Life Hacks: Making Clear Ice
Making clear ice in a 6-pack cooler.
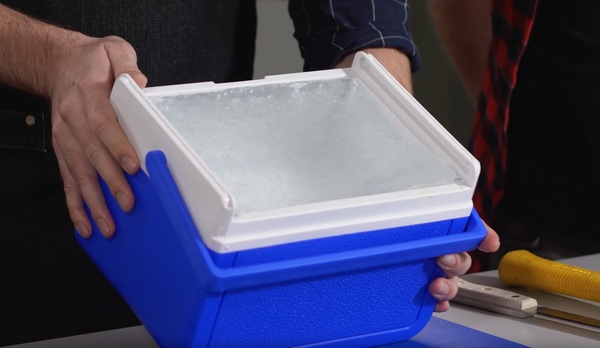
If you’ve ever looked into making clear ice for drinks, you know that there are all sorts of assertions about needing to boil the water first, or using filtered water, or you need a special clear ice maker. According to Nick, the Cocktail Chemist, in this video, all you need is a small 6-pack cooler with the lid removed. Thanks to directional freezing, all of the impurities (clouding, bubbles) settle to the bottom of the open cooler as you freeze it and the top section of the resulting ice block will remain clear. Simply remove the block and cut off the bottom part to have a clear block of ice remaining.
TOYS! Automatic Wire Strippers
You need these.
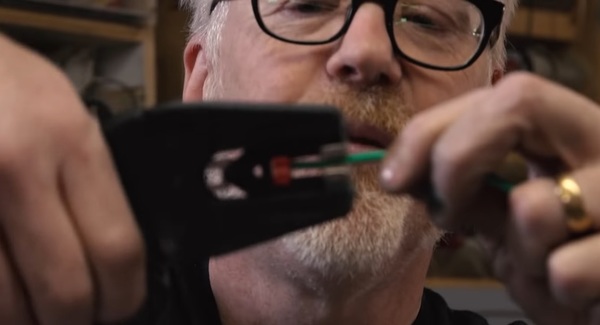
On a recent Tested tools video, Adam explains how much better automatic wire strippers are from conventional manual strippers. You probably already know this, but if not, you’re welcome. He suggests this reasonably-priced model. You can even go cheaper. I have this type of under $9 strippers (gifted to me by the lovely and talented John Park). Since I don’t do a lot of electronics these days, they serve me perfectly well for occasional use.
Colored Gel Follow-Up
Speaking of John Park, he followed up on the item I ran last issue on using color gels to make more vivid LED segmented displays. You can get a sample swatch book of gel colors for free or next-to- nothing at camera or theater supply shops. A book of these should set you up with gels for a while.
More on Calculating Load Safety
One of my newsletter readers, Mike Heinicke, responded to my piece on calculating load safety in the last issue:
I work in the entertainment industry, primarily in theater. We often use 6:1, 8:1, or even 10:1 design factors for our rigging. We very rarely go under 5:1, other than in very specific instances. As an aerial rigger, we often use 8:1 or 10:1 design factors.
I have personally never heard the term “safety tolerance.” An older, but still used, term is “safety factor.” I believe the preferred term in the industry now is “design factor.”
02/27/20(Gareth’s Tips, Tools, and Shop Tales is published by Cool Tools Lab. To receive the newsletter a week early, sign up here. — editors)