Using Bits of Left Over Molding Rubber to Volumize New Molds
In this Robert Tolene video, he offers a tip for saving on molding materials. He calls it “dunkin’ chunkies” — he cuts old mold pieces into small chunks and adds them into a new mold pour (in the areas where they won’t interfere with the object being molded).
Using a Shop Towel to Constrain Snipped Bits
From a Pask Makes video: When cutting/nipping bits of metal or other material that might fly away, line up your cut and then cover the workpiece with a towel before doing the cutting. This will prevent the waste pieces from flying all over your work area.
A Web App for Creating Project Boxes
Via Bob Clagett’s I Like to Make Stuff: MakerCase is a free web app that allows you to design boxes and project cases that can then be laser- or CNC cut. Once you’re satisfied with your design, MakerCase turns the model into an SVG or DXF file that can be sent to a laser cutter or CNC router.
Put Screws Back When Disassembling
Via this Tested video from Adam Savage: In disassembling parts you’ll be reassembling, rather than storing the hardware somewhere and then trying to remember where it all goes back, temporarily hand-screw it into the threaded part of the piece for safe keeping.
Here are some of my favorite tool mentions from the newsletter this year.
Recommended by reader Emory Kimbrough:
Titmus SW09R Livewire sealed glasses – they combine ANSI-rated impact protection with dust seals, a removable head strap that creates an even better seal against sneaky dust, and keeps the glasses from slipping down or slipping off at a bad moment. Finally, these were available with progressive lenses and in my strong prescription. Got mine with good customer service and prompt shipping from safetygearpro.com.
On the subject bit drivers, reader KokoTheTalkingApe, chimed in:
“My favorite is the Wiha Ultra Driver. It stores 13 double-ended bits in the handle, so it has 26 tips. The bits are stored in two rotating carousels that fan open when you pull them out. I don’t usually like proprietary bits, but these have held up well and replacements are readily available. The bitholder locks onto the bit. Made in Germany. Not ratcheting.”
Via Stumpy Nubs came this brilliant idea of wrapping your tool handles in stretchy, grippy hockey tape.
The iFixit electronics driver set is well thought out and designed, solidly built, with 64 bits of every configuration you’re likely to encounter: Slotted, Phillips, Torx, Torx Security, Square, Pentalobe, Hex, five nutdrivers, and more. There is also a flex extension shaft and the lid acts as a small parts sorting tray.
Mentioned in newsletter 118, at only $119, the Craftsman 7-¼” cordless circular saw is amazingly good for the price.
In issue 122, I included testing of folding knives by Todd at Project Farm. The surprise knife was the Kingmax at an amazing price of $13. And from an earlier Project Farm knife test: Smith & Wesson ($15.50).
This was the year I finally fell in love with Carhartt work shirts. Don’t know what took me so long. Also available in women’s sizes.
Need mechanical shop pencils? You want a FastCap FatBoy.
Maker Slang for 2022
I rounded up all of the content from the maker jargon and slang columns this year and did a Boing Boing post. You can see the entire list here. And last year’s list here.
Support This Newsletter, Buy My Merch
If you’re looking for great gift ideas for any maker on your shopping list, consider my two Amazon best-selling tips books (Volume 1, Volume 2). They are filled with tips on things like cutting, gluing, fastening, painting, finishing, electronics, soldering, 3D printing, hobby tips, and much more. The books are designed to appeal to DIYers of all skill levels and interest areas.
Become a Patron!Support our reviews, videos, and podcasts on Patreon!
Cool tools really work.
A cool tool can be any book, gadget, software, video, map, hardware, material, or website that is tried and true. All reviews on this site are written by readers who have actually used the tool and others like it. Items can be either old or new as long as they are wonderful. We post things we like and ignore the rest. Suggestions for tools much better than what is recommended here are always wanted.
Five year diary- only a couple sentences a day, but the perspective that emerges once you are into the second or third year is incredible. Like, it turns out everything bad happens to me on December 11. Everything good is first week of April. I’m on year 7.
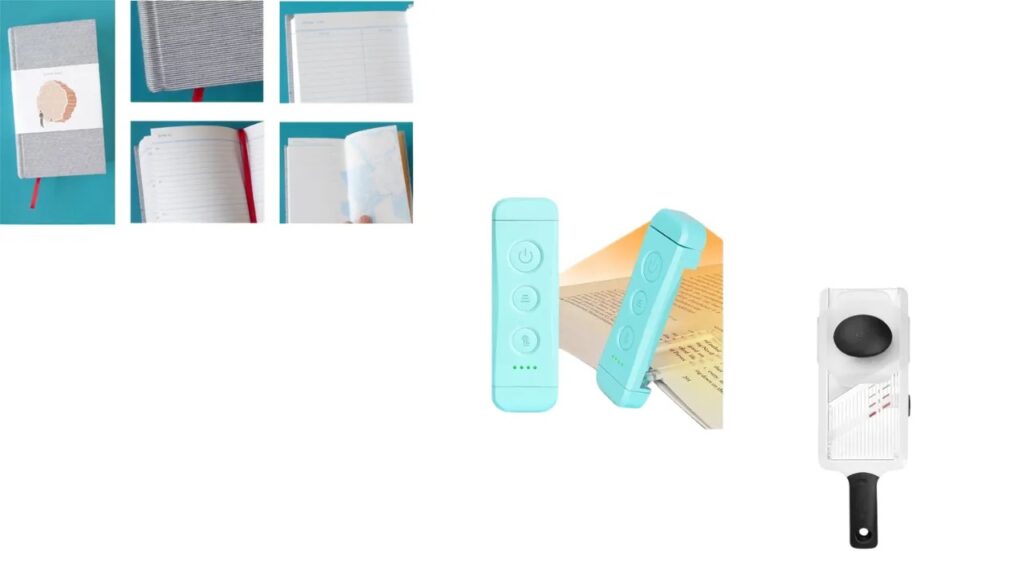
Reading light (bookmark style from Glocusent) - this tiny thumb drive of a nightlight saves me from looking at my phone if I’m awake in the night, with warm and cool settings and different brightness.