Painting
Tools for Possibilities: issue no. 52
Once a week we’ll send out a page from Cool Tools: A Catalog of Possibilities. The tools might be outdated or obsolete, and the links to them may or may not work. We present these vintage recommendations as is because the possibilities they inspire are new. Sign up here to get Tools for Possibilities a week early in your inbox.
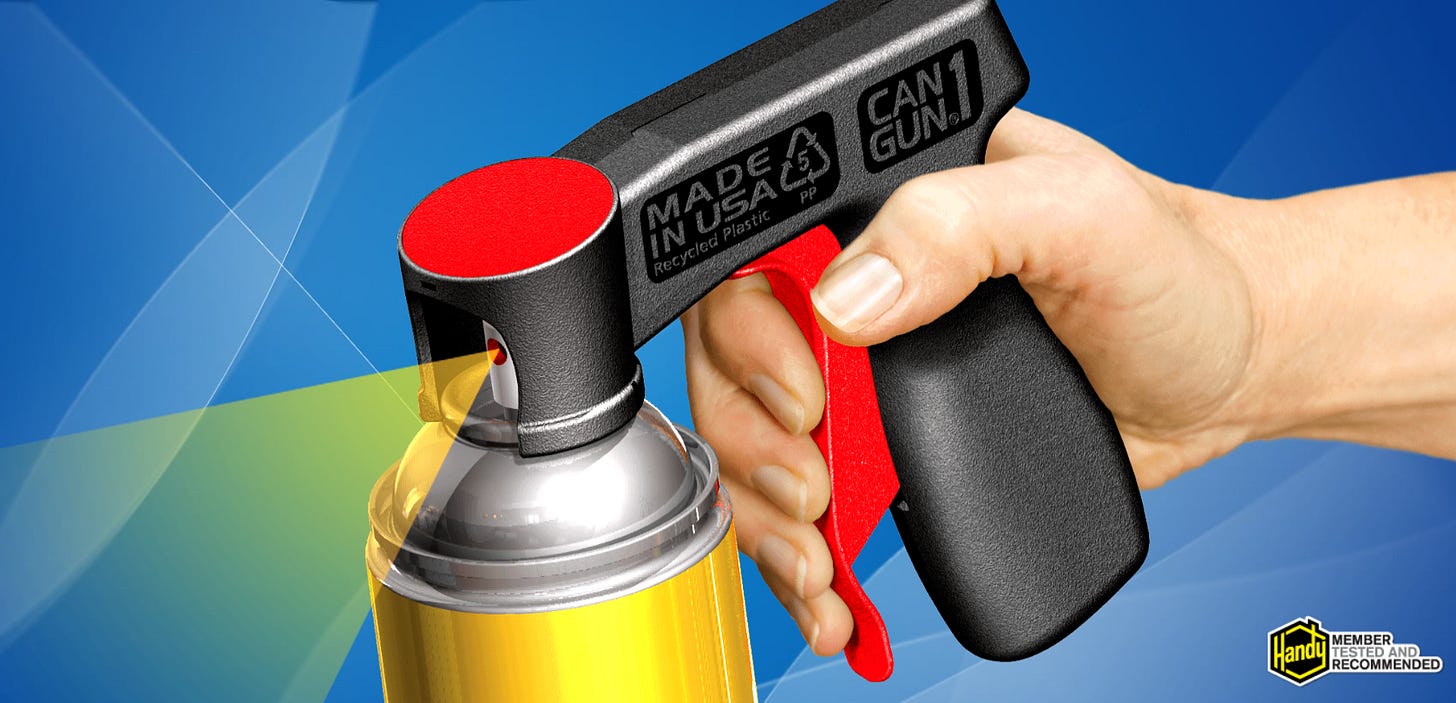
Comfy spray can gun
Using your index finger to press and steer a can of spray paint gets old very quickly. If your paint job lasts more than a few minutes, you really should use a snap-on pistol grip. It saves your knuckle, keeps paint off your trigger finger, and gives you an easy way to guide the spray. For years I’ve used an earlier model of this grip (called simply Can-Gun), but that one was only operated with a single finger trigger. This new version uses your whole palm. It’s comfortable, quick-on and off, and the only way to spray. I had a 5-can job on a chain-link fence and the Can-Gun made it kind of fun. Even for small spray paint jobs, I slip one of these on. — KK
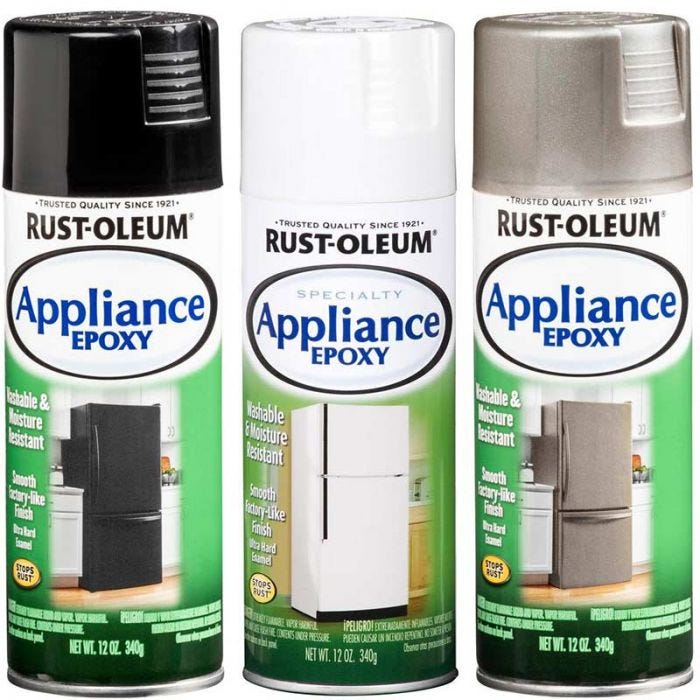
Extra tough spray paint
Rustoleum Epoxy Appliance Paint
I learned about this spray paint a while ago from an old gent that restores appliances. The paint is a super-hard washable epoxy coating for appliances that have scuffed or discolored surfaces. The spray paint goes on very smoothly; I’ve used 4 cans worth, and have not had any drips or runs. I used it first on an old refrigerator, the front of a gas stove and the vent above.
Heat doesn’t seem to bother it, or at least it hasn’t bubbled. The paint dries in about 2 hours to a touchable surface, but it is best to let it sit for a few hours, and it really looks good. Price at Home Depot was $6.00 a can, same as any other Rustoleum product. It comes in several colors and can also be purchased, apparently, in gallon cans. For the price it is hard to beat, and for this application I haven’t seen any comparable product that works as well. It is a very easy and practical way to refurbish old appliances. My wife even likes it.
Note: For those looking for higher heat applications, Rustoleum makes a high-heat enamel spray for restoring grills and other hot appliances that can withstand a wider temperature range. — Stephen Young
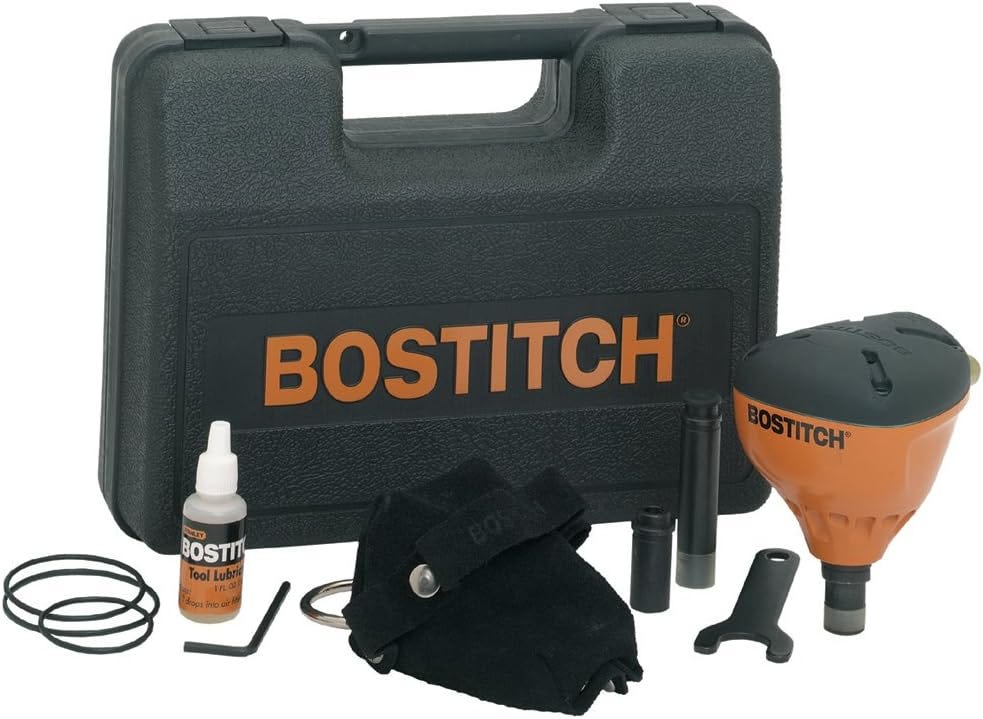
Hand-size air-compressed hammer
A palm nailer is a magic hammer. Like a nail gun, you hook it up to an air compressor, but unlike a nail gun, it can be held in the palm of one hand. Its appearance doesn’t make its usage obvious, but this air tool pounds in nail after nail without hurting my hand at all. Just place a nail exactly where you want it. Press the opening on the nailer over the nail, and BAP! BAP! BAP! BAP! BAP! — compressed air drives a little hammer head inside the sleeve to gently pound in the nail. It takes about 10+ taps to get a nail all the way in, but in under a second.
I never knew about palm nailers until my brother-in-law clued me in — and he learned from a friend who is a carpenter. They’re perfect for working with precise positioning, like if you are putting together something with the previously-reviewed Simpson Strong-Tie connectors. I specifically bought mine to do the siding on a backyard shed with a fort for my kids. I just wish I’d known about it when I was doing the framing. I used a lot of Strong-tie connectors that required a whole lot of manual wrist-busting hammering of nails, because — unlike the palm nailer — a framing nailer just isn’t accurate enough for the Strong-tie holes.
The palm nailer is a total joy to use. I love my air compressor and air tools (and have three nail guns already), but another plus is the palm nailer works with any single nail, not just framing nail-gun feed nails. Also, the size of the palm nailer lets you get into places either a framing nailer or a manual hammer simply can’t fit very well. I’ve only used a Bostitch-branded palm nailer that I picked up at Lowe’s. It was like $80, so not what I’d call cheap, but it’s made by a solid manufacturer and it’s readily available online and if you’re walking into a big box hardware store. — Eric Lundquist
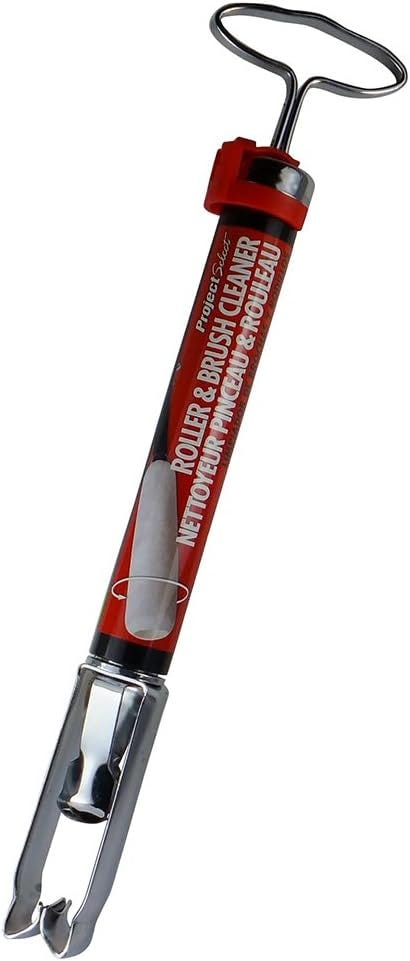
Paint Roller Cleaner
This is the best way I have found to clean paint rollers.
After squeezing and/or scraping as much paint out of the fur of the roller as possible, it only takes the Roller Washer about a minute or two to blast water deep into the roller and rinse away the remaining paint.
I usually then give my rollers a “shampoo” with some liquid soap, and moving the roller up and down inside the Roller Washer until the soap bubbles disappear. This is followed by spinning the roller on the frame with an air compressor blow gun to remove the water and fluff the fibers. — Andy McConnell
Centripetal brush cleaner
A paint brush spinner is used to clean paint brushes or roller covers. With water-based paints or varnish you simply insert the brush handle into the tongs or grippers, or slide the roller cover over the outside of the tongs. Then while running the brush or roller cover under water from the utility sink (or garden hose and garbage can) you get it spinning.
The brush spinner has a spiral shaft that when pushed into the body rapidly spins the brush or roller cover. The whole process is similar to a child’s spinning toy, with the end result being that dirty water and paint is flung off. A similar process can be used with oil-based products.
The only downside is that the spinner spiral shaft eventually gets rusty and needs lubrication. In the past I’ve used DL Waterless Hand Cleaner to remove any rust that builds up. — Peter Klemann
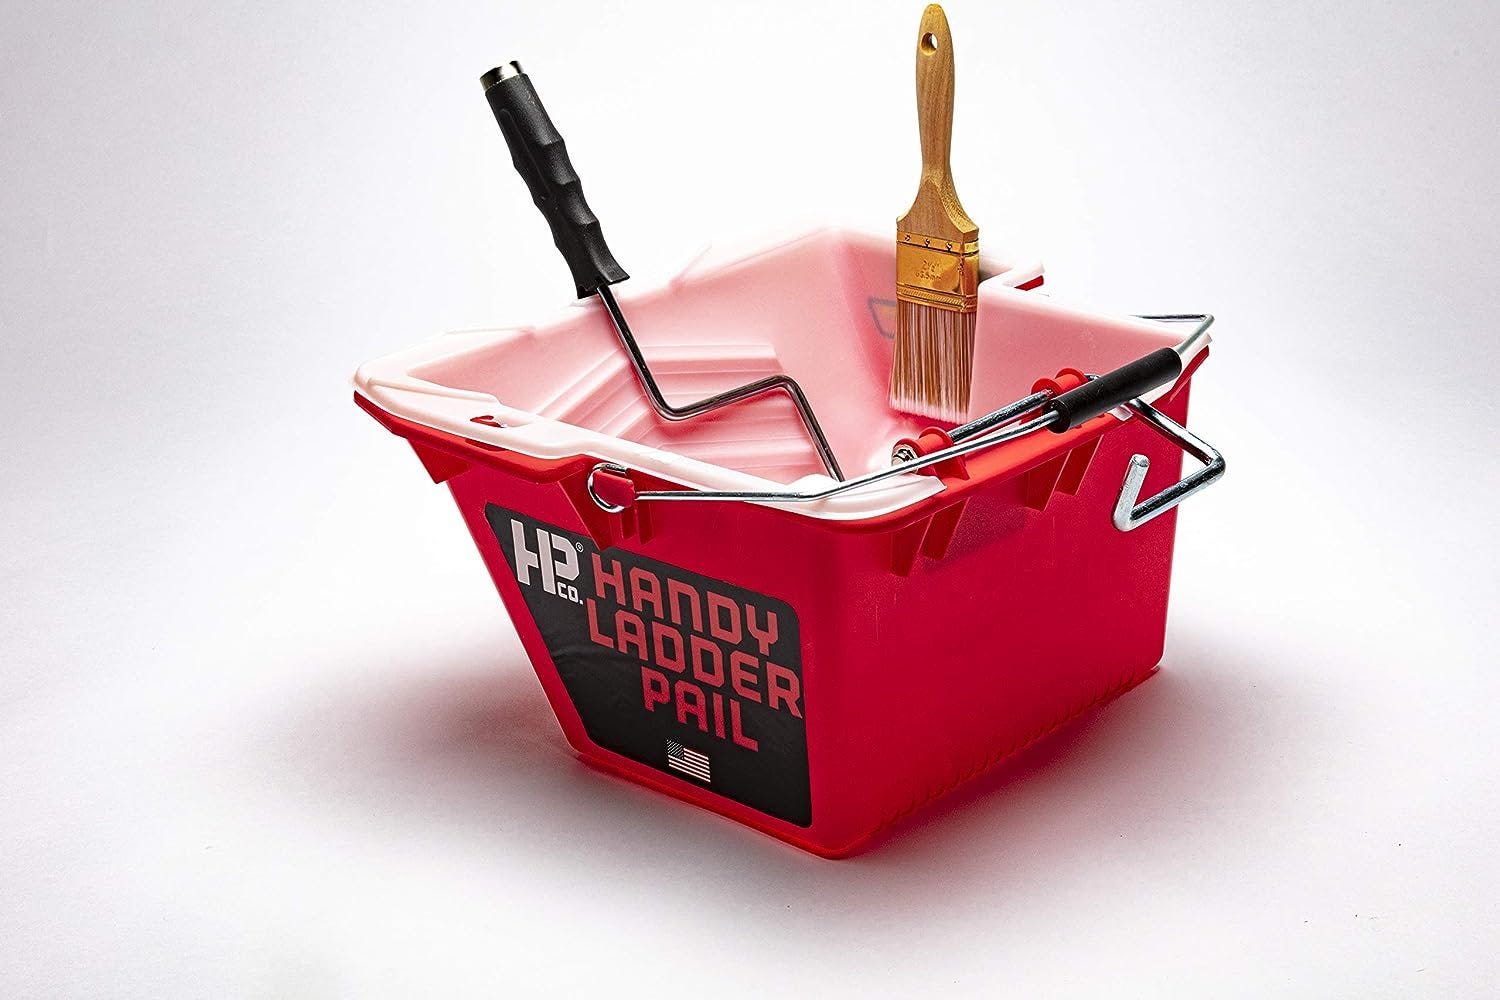
Better paint & roller holder
I’ve always done my own painting. I’ve owned a number of boats and have restored an 80-year-old house. Through all that I used dozens of metal and plastic roller pans, the standard variety that are widely available for next to nothing. While they are ubiquitous and cheap, they don’t keep the roller out of the paint; they don’t have a place to keep a brush out of the way and out of the paint; and they’re easily knocked off your ladder’s paint shelf. This one by Bercom rules them all and is well worth the money.
It’s listed as a ladder pail, but it’s really best as a replacement for a standard paint tray. I can fill this bucket with paint, hook my roller on one side, a good brush on the other and proceed to neatly and easily paint both from the ground and from up on an extension- or step ladder.
I’ve used it for more than a year and have done a number of rooms with high ceilings in two different houses. The ability to suspend both the brush and the roller above the paint and use either without interference, easily, on a ladder make this bucket a joy to use. All the fittings are first rate. The shape is perfect. Even the little details shine, such as the molded-in channels to make pouring the paint from the bucket back into the can smoother.
And the magnet that holds the brush is removable for cleaning, which means I can easily get the bucket back to like-new condition. All in all, I highly recommended it. I won’t paint on a ladder without it. — Dennis Faust
09/18/23


