Talk to me. Tell me a story. Share me a tip. A tool.
Support my work by buying my tips books (Vol. 1, Vol. 2).
Take out an Unclassified in this newsletter to reach fellow makers.
Which Ratcheting Screwdriver is Best?
There are few hand tools that people seem to have more opinions about than ratcheting screwdrivers. And, now we have some decent testing of this everyday tool by Todd at Project Farm. Todd tests 14 different brands for efficiency, precision, and durability. Tests included working arc swing, ratchet back drag, magnet strength, bit retention strength, build quality (shaft wobble), shaft rotation in the locked position, bit failure load, and screwdriver failure load. Bottom line? The PB Swiss screwdriver, at a whopping $144 (at time of testing, now $178!), performed the best. This was followed by the $70 Linus Tech Tips driver. The Megapro and Williams also performed well, at $34 and $36, respectively. I have the Williams driver and have no complaints.
Tips on Quickly Learning a New Skill
In this video, engineer Jeremy Fielding drops a ton of wisdom via 26 strategies for learning a new skill, fast. Many of these might seem obvious (you must be motivated, mistakes will happen), but it’s in the unpacking of these ideas and the case examples he uses that make this video most valuable. And, there are a number of tips that one might overlook or not consider, like asking family and friends if they have resources related to the skill you wish to learn, not being afraid to ask someone to teach you what they know, and the idea that you only need to learn the essentials first, then you can dive in and learn by doing.
Making Clay Out of Common Soil
As my Southern mamma used to say: “Put a new wrinkle on your brain every day.” Here’s today’s wrinkle: I had no idea that you could derive clay, suitable for making pottery, from common soil. I thought you had to find a vein of red clay and harvest that. Sure, such clay is obviously preferred, but you can also render out clay using reddish soil (which has high clay content) or really any type of soil. All you need to do is suspend the soil in water and filter out the heavy materials. After straining through a cloth, you are left with clay.
Maker Slang
Jargon, slang, and tech terms from the diverse worlds of DIY.
Hero prop – In movie-making, a detailed prop designed for close-up shots and closer scrutiny from the audience. In contrast, action props are used where the audience will not see the prop in close-up.
Scumbling – In painting, to soften (the color or tone of a painted area) by overlaying opaque or semi-opaque color applied thinly and lightly with an almost dry brush. I learned this one from my artist wife, Angela White.
Weeding – In vinyl cutting, the act of removing all of the unwanted vinyl around your cut design.
TOYS! Better Sink Strainer
I watched a video a few weeks ago on Cool Tools where Donald Bell extolled the virtues of this OXO sink strainer. Like him, I hate the design of most metal-basket strainers. I ordered one of these and was so impressed with it that I wrote a Boing Boing post about it. Hundreds of BB readers followed suit and many of them are as happy with theirs as I am with mine, so I thought I’d share it here, too.
I made two racks for my Stanley and Harbor Freight sorting boxes. One I welded and later decided it was way overbuilt. Too heavy especially once loaded with full trays of screws, etc. The second one I built a simple frame from 2 x 4s, then slid small shelves out of thin material like Masonite across both sides. It may not be as easy as baker racks, but I’m pretty sure it’s the cheapest way to build a rack in terms of materials. Plywood would be nicer all around, but 2x4s are cheap new, and almost free used.
***
Reader Jim Landis wrote:First, thanks for all the fascinating information you keep publishing. I’m a big fan. I’m sure others have discovered this, but some readers might find it useful. When I’m knocking together a quick model out of soda straws and paper clips, etc to get a feel for a project, 1 centimeter to 2 inches is a very convenient scale to use.
1. It’s easy to double or halve numbers without too much mental effort.
2. There’s always a ruler nearby with both inches and centimeters marked in parallel.
3. It’s very close to a 1:5 scale, so models are a nice size for desktops. For context, the original GI Joe dolls, -ahem- action figures, were 1:6 scale.
Become a Patron!Support our reviews, videos, and podcasts on Patreon!
Cool tools really work.
A cool tool can be any book, gadget, software, video, map, hardware, material, or website that is tried and true. All reviews on this site are written by readers who have actually used the tool and others like it. Items can be either old or new as long as they are wonderful. We post things we like and ignore the rest. Suggestions for tools much better than what is recommended here are always wanted.
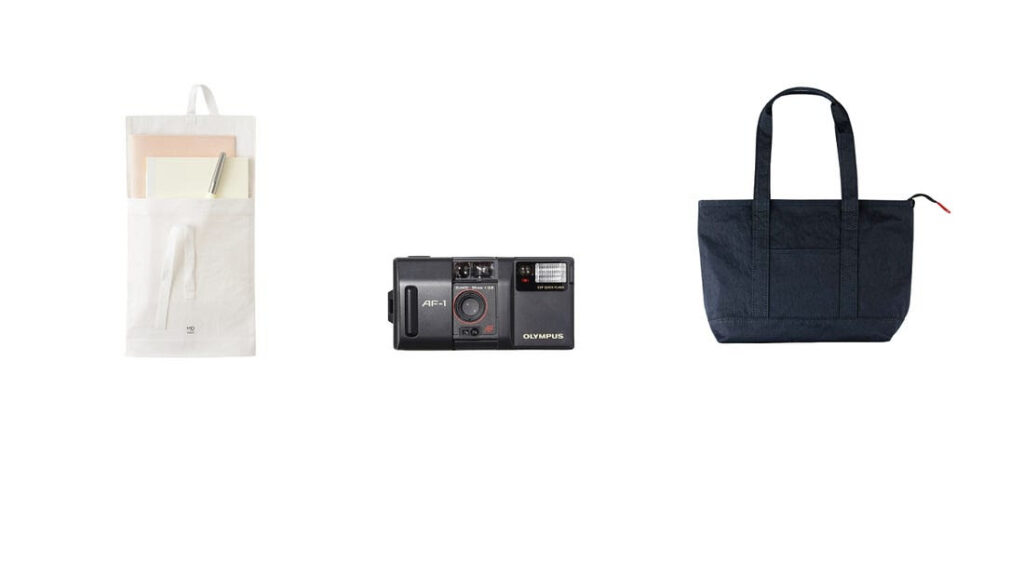
The hexayurt is an update on Buckminster Fuller’s geodesic dome and is a sturdy, affordable, easy-to-build temporary shelter. The geometry has been adjusted slightly to make it easier to build domes from materials like plywood, insulation, plastic, cardboard and more. The hexayurts are made from only one kind of triangle: an 8′ x 8′ isosceles triangle, rather than the strangely-shaped triangles which are standard for Fuller-style geodesic domes. They are not strictly geodesic, either, but it doesn’t seem to matter much in practice. The slightly stiff, angular lines look a lot like any other dome.
The most common place to see hexayurts is at Burning Man. The first one was built there in 2003, and was only a little bigger than a tent. There now range in size from 50 to nearly 500 square feet. A typical year at Burning Man will see a hundred or so of the silver huts lined up on the playa.
The design is public domain and build-it-yourself. People using the shelter for Burning Man usually buy the materials (about $300) ahead of time, including mail ordering the hard-to-find extra wide tape which is used to hold the shelter together. It takes about a day’s worth of effort to cut out the roof pieces, playa-proof the edges and do a test assembly. Putting the hexayurt together on the playa typically takes a small group of people about two hours and can be a struggle if there is wind or a dust storm which coats all the pieces in a fine layer of tape-defeating dust.
The joy of the thing is a building which stays relatively cool in the desert. The shiny surface of the hexayurt reflects away a lot of the sun’s heat, and a mix of pump sprays, swamp coolers and even the occasional air conditioner make the inside quite habitable even in the middle of the day when tents are far too hot for comfort. There are lots of plans and instructional videos on the Hexayurt web site, and handy people seem to have little difficulty putting them up.
A few simpler units, made from plywood, have been tested by local charities in Sri Lanka and Haiti. The jury is still out on whether this shelter will be useful beyond recreational use in the desert, but field trials are underway. — Howard Rheingold and Vinay Gupta
Although I have never made a yurt, but I’d like to. This book tells you how. It assumes you have more time than money.
A yurt is a temporary tent house. It’s not really portable. The Mongolian version weighs 200 pounds — strong wooden frame covered in thick felt. If you really want portable, get a modern dome tent. But if you want a compact summer house, a cabin, a seasonal shelter encased in the mythical round, then a yurt could be perfect since you can make one of these yourself, with the added bonus that you can move it if you have to.
This book is an update of a 1980s classic. It takes the hippie approach. The drawings are all you need. Their instructions are rough, approximate, but satisfyingly visual. The book is motivational simply by being clear and rustic. Precision is not required, craft-smarts are. It assumes you are a do-it-yourself person. —KK
When nomads gather, the topic of tipi vs. ger/yurt may surface. It's a circular argument. Both are functional and beautiful; the pros and cons balance out. Choose the lodge that best fits your situation and personality. The straightforwardness of the tipi, its pyramidal shape, the feeling of infinity inside looking up at the apex of the cone, make this Native American design a masterpiece. Because of the slope of the roof, the tipi can shed rain and handle a snow load better than a yurt. On the other hand, the basket-like frame of the ger culminates at the smokehole, the crown, the tono. A low ceiling makes it easy to heat and the short poles fit on or in most vehicles. The straight wall of the yurt give you as much head space as floor space, unlike the tipi.
As some kind of comparison, this drawing shows outlines of an 18-foot tipi and a 13-foot yurt, both using the same amount of cover material (33 yards, 6 feet wide).
Domes are the most efficient way to build a shelter, covering the most space with the least material. But all domes leak in the rain (ask anyone who has lived in one). Yet, because they can be erected quickly, cheaply, and make wonderful, uninterrupted, open, almost magical, spaces inside, domes are perfect where it does not rain. Or on a temporary basis. Or both. Like Burning Man.
Once popular in the 1970s as alternative housing, then abandoned as impractical a decade later, domes are now in a resurgence because they are nearly ideal structures for arid and temporary shelters at Burning Man. This instant city now sports more domes than anywhere else in the world, and many of these are quite large. Considering how vast they are, it is amazing they can be thrown up in a few days by a small dedicated crew. And then be re-erected the next year.
You can use any set of long uniform pieces for the structs of a dome, from 2x4s, to electrical conduit pipe. The key critical pieces are the hubs which connect the structs, and the strut lengths. These must have a mathematical precision, and their dimensions vary by the size and variation of the dome species.
Therefore if you want to build a geodesic dome structure, you need to be able to construct strong hubs accurately. Domerama is the guide you need. This website shows you how to calculate struct lengths and how to make (or where to buy) dependable hub connectors. Using this site many amateurs have successfully built domes that worked the first time; you’ll need help: remember this is a very math-intensive endeavor.
The site has tons of materials on the varieties of domes, erecting domes (not as easy as you think), designing them, what to use as coverings, and introduces global dome culture. It is the best place to keep up on dome innovations: one cool new idea is to shrink wrap domes. Find out how here. Domerama is better than any current book on domes by far. — KK
Advantages of shrink wrap covering:• Will hold up under extreme weather conditions • Translucent to let a large amount of light inside the geodesic dome structure • Easy to repair, simple to create ventilation in the form of windows • Strong enough to handle freeway and railway speeds • Seams bond through heat, creating a seamless containment • Will last up to 2 years in fully exposed outdoor conditions
Tyvek for covering geodesic domes:Noise factor: when the wind hits the Tyvek® covered dome there may be flapping and so a lot of noise at high winds. Hard structure Tyvek® (the one you normally find at the hardware store) is stiff and noisy when new, but if you put the Tyvek® in a washing machine on the delicate cycle with no detergent for 2-3 cycles, it comes out soft and much more fabric-like. Washing this type of Tyvek® does not seem to affect the water resistance but can cause some shrinkage. 5% should be added to measurements to allow for shrinkage if you are going to wash your Tyvek® .
This is the classic way to connect geodesic struts together. A hole is drilled in the flattened ends then bolted together.To accommodate a drilled hole into your struts, the length of the strut needs to be longer.For example a 36 inch pipe/conduit strut will need to be extended at both ends to drill holes. A rule of thumb is to add 2 X 3/4 inch = 1.5 inches (or about 8cm) more to all struts. That means the center of the holes would need to be drilled 3/4″ from each strut end.
Domekit.cc is a project looking to make dome building simple and fun. They developed a hub connector featuring a robust ball-and-socket joint and an integrated thumbscrew that securely locks the strut to the node.These 3D-printed connectors are made in small batches in workshops and garages across the USA by fabricators with open-source 3D printers like the Makerbot. The principal fabricator for the 3D-printed connectors is Mark Cohen, who operates five 3D printers out of his garage in Brooklyn:This is the Starplate system offered by Stromberg’s. Starplates are steel plates, with channels to hold 2×2′s, 2×3′s or 2×4′s. You simply drill holes in each end of 25 struts of equal length and bolt them into the 11 star plates to build a solid, mini-dome framework in a couple of hours.
Once a week we’ll send out a page from Cool Tools: A Catalog of Possibilities. The tools might be outdated or obsolete, and the links to them may or may not work. We present these vintage recommendations as is because the possibilities they inspire are new. Sign up here to get Tools for Possibilities a week early in your inbox.