Etching with a 9v Battery
Gareth's Tips, Tools, and Shop Tales - Issue #73
Etching with a 9v Battery
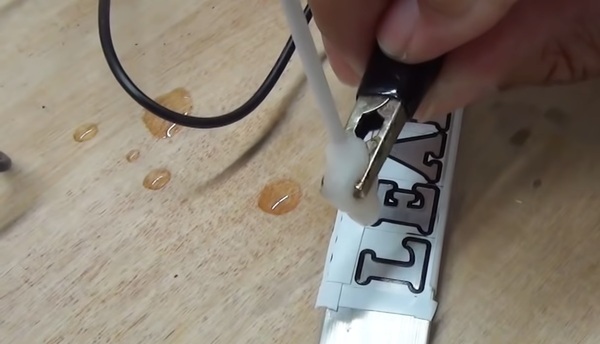
Etching is easier than you think.
Leah of See Jane Drill demonstrates how easy it is to etch a metal surface using little more than a 9v battery, wires, vinegar, salt, and Q-tips.
Finding the Center of a Dowel/Rod with Sandpaper?

Using only a drill and sandpaper to find a centerpoint? Genius!
Emory Kimbrough writes: “Here’s a method for finding the center of a dowel or any solid rod that will fit into a drill or drill-press chuck. Besides the drill or drill press, it uses only sandpaper. A lot of center-finding methods that use pencil-and-straightedge geometry or store-bought center-finding gizmos become hard to use and inaccurate on small-diameter rods, but this method excels with the skinny little workpieces. Just place the rod into the drill chuck and spin the end of the rod against the sandpaper. The sandpaper will scratch a bulls-eye pattern of concentric circles in the rod’s end, revealing the center (see pic on right). Center-punch the bulls-eye and you’re ready to drill into the cylinder’s axis. This works for both wooden and metal rods. If the concentric rings aren’t as distinct as you’d like, try a different grit of sandpaper.“ In the left photo above, some ½” aluminum round stock is being spun in a drill press against some coarse sandpaper glued to a wooden block. In the right photo, you can see the bulls-eye pattern on a wooden dowel.
Carrying Electronics in a Hanging Jewelry Bag
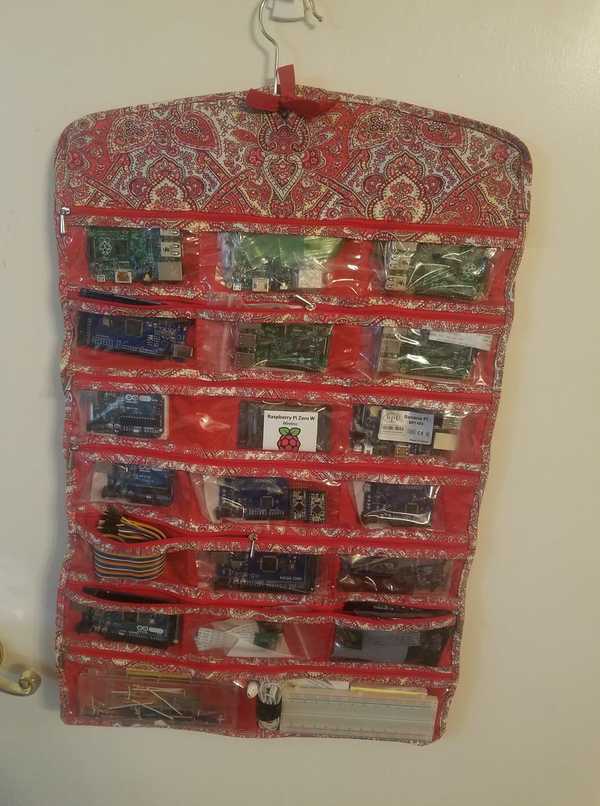
Hmmm… should I go with the ribbon cable choker or the Raspberry Pi earrings?
My friend Jade Garrett offers this really clever idea for traveling with and organizing microcontrollers and electronics. She uses a hanging jewelry organizer. She says she’s pulled this out at a hackathon to hilarious reactions.
Finding the High Point of a Horizontal Pipe, Dowel, or Other Round Object
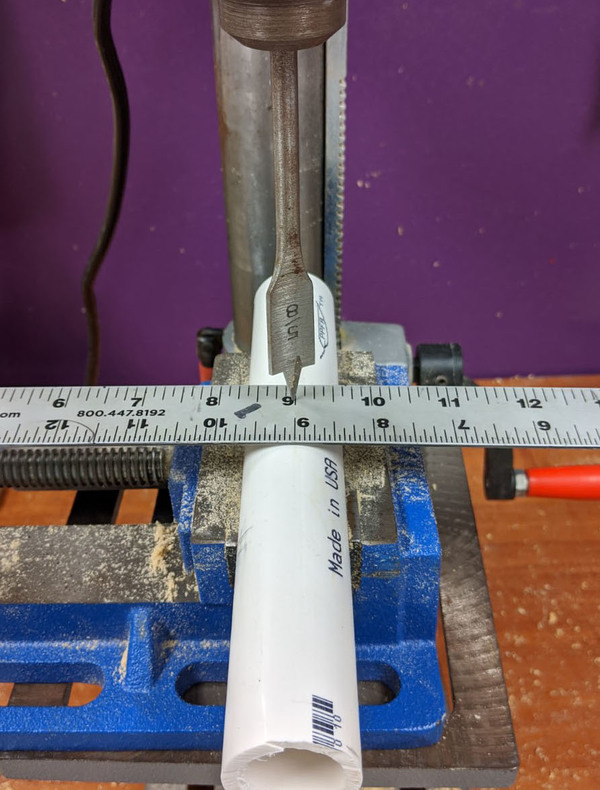
The high point of a pipe.
Another great tip from the brilliant Emory Kimbrough:
Here’s a fast and easy way of finding the high point of a horizontal pipe, dowel, or other round object, using common tools.
First, clamp the cylinder horizontally into a drill press vise (or any other secure holder, such as a V-block, that you can slide around on your drill press table). Slide the clamped cylinder directly under the press’s chuck, using your best eyeball guess.
Next, place something sharp and pointy into the drill press chuck – the point in the center of a Forstner bit is ideal, but other bits will work, as will a sharp nail with the head cut off.
Now, place a metal ruler cross-ways on top of the cylinder, roughly balanced (see photo). Lower the drill press handle until your pointy object lightly presses the ruler against the top of the cylinder. Most likely, your eyeball guess was slightly off of perfect alignment, so the trapped ruler will lean left or right, since it’s being pressed into the cylinder slightly off of the peak. Just slide the clamped cylinder as needed to make the ruler level.
When the pointy thing holds the ruler level, the drill press chuck is now straight above the highest point on the cylinder. Clamp the vise to the table without moving it, and everything is now aligned to drill right through the center.
This method also works with spheres. Just check that the ruler doesn’t tilt right-or-left or front-or-back. You can also use a metal sheet to better see the tilt on both axes.
You can even do this by hand, without a drill press. Press the ruler gently against the cylinder or sphere with the tip of a pen or pencil, moving the point until the ruler levels. Now, carefully slide the ruler out of the way without moving the hand that’s holding the pencil or pen, and make a mark. No, it’s not as accurate as using the drill press, but it’s still better than guessing by eye.
If you need to draw a line along the crest of a cylinder instead of a single mark, just make two marks, as widely separated as possible, using this method, and draw a line connecting the two marks.
Cable Wrapping with Zip Ties
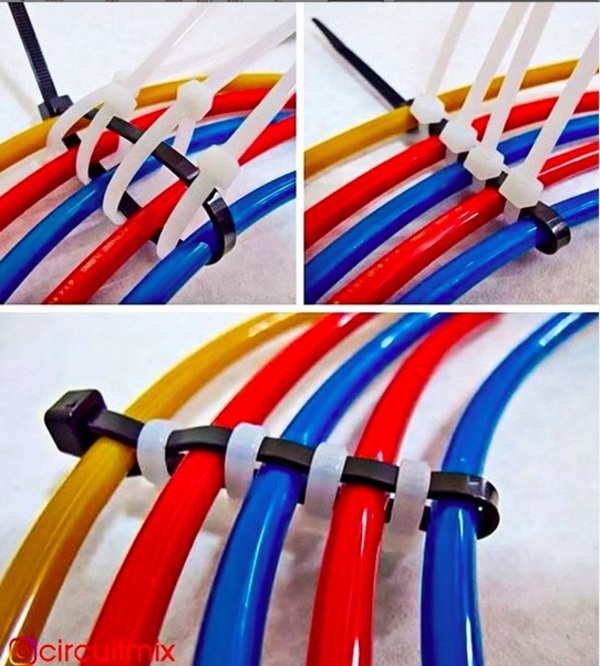
Via @circuitmix on Instagram
3D Printer Noise Reduction for Two Dollars
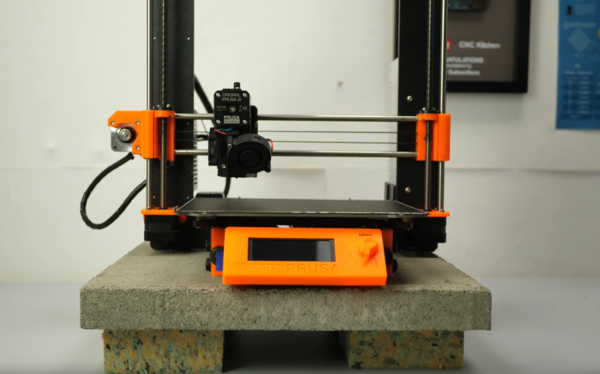
Silence that rattle trap for two bones.
Stefan of CNC Kitchen explains why he uses concrete “pavers” (which you can get at a home store for about US$2) under his printers. Basically, it’s for noise reduction. But being a CNC Kitchen video, he goes into great detail about what actually causes the sounds that can make your printer annoying to be around and ways of mitigating the racket. He also looks at other noise reduction measures, like 3D-printed spring feet, foam pads on your printer’s base, and a foam pad below a paver base.
Making a Rag-in-a-Can Oiler
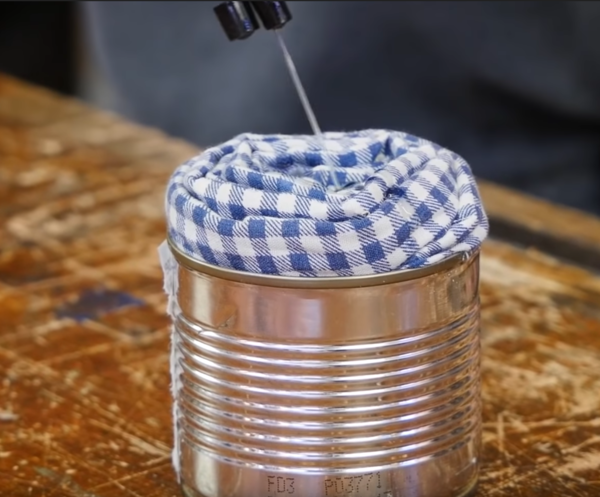
By way of woodworker Paul Sellers comes this handy tip for creating a can oiler for lubricating flat surfaces like machine tables, saw blades, etc. Basically, you just stuff rags tightly into a small can (or plastic spray can lid) and then soak the rag with your favorite shop lubricant.
Using a Laptop as a Backdrop
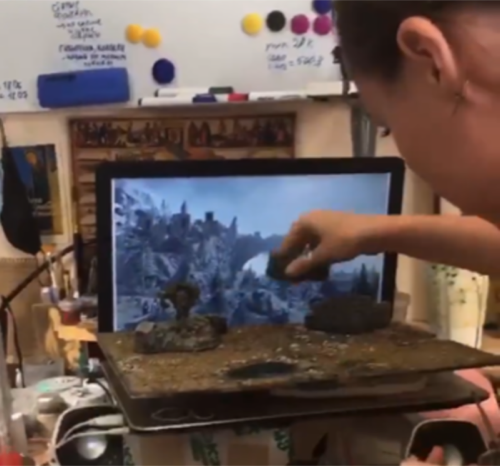
I’ve written about folks using their laptop screen as a light table for tracing. Here’s another great off-book use (from the Tiny Furniture IGram page) – using your screen as a photo backdrop for small items.

Making Your Own Coiled Cabling
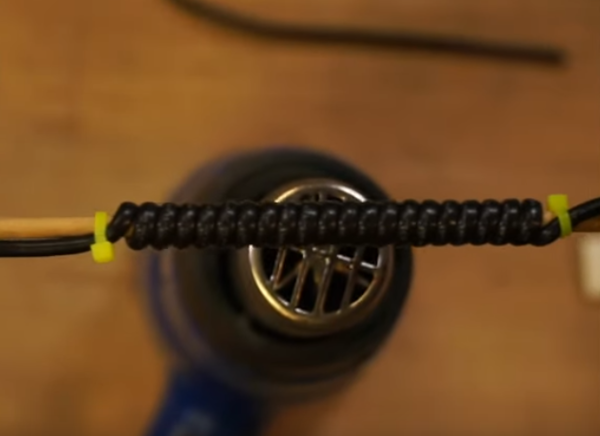
In this video by our ol’ pal, John Park, he demonstrates how you can use the thermo-forming properties of most plastic-based equipment cabling (e.g. USB cables) to create coiled cables. Basically all you need is a heat gun, a dowel, and some zip-ties.
Using the Pomodoro Technique to Fight Distraction
In his first issue of Mark Frauenfelder’s newsletter, The Magnet, he talks about the Pomodoro productivity technique. This is a method for trying to focus on the work at hand in our extraordinarily distracted modern world. The basic idea is to set a timer for a set interval of time (say, 25 minutes), come up for air for a set interval (say 10 minutes), set the timer again, rinse, repeat. When under the timer, you do nothing but the work at hand. No checking your phone, email, FaceFart, etc. I had no idea it had a name, but I’ve used the timer technique for years. Sometimes, it’s the only way I can get anything productive done. I set my timer for 56 minute sessions (don’t ask).If you have similar distraction issues, consider giving this method a try.Sketchplanations has a good, short guide to the Pomodoro Technique.
(Gareth’s Tips, Tools, and Shop Tales is published by Cool Tools Lab. To receive the newsletter a week early, sign up here. — editors)